
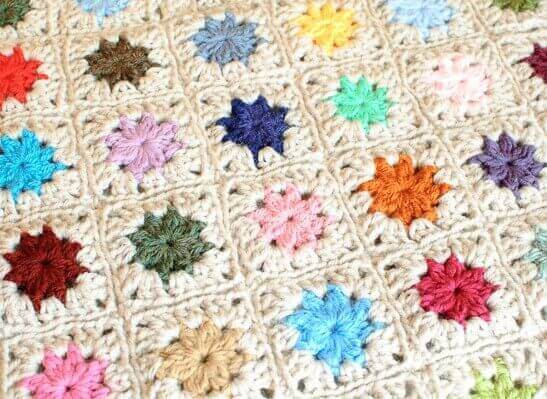
Last week I shared with you the pattern to make these pretty Cluster Burst squares. I hope you have been having as much fun crocheting up little colorful stacks of these sweet squares as I have. Today I want to give you a little “how to” on joining crochet squares. You may already know there are many ways you can join crochet motifs, including the JAYGO method that I used for my Granny Square Scrapghan, but for this afghan I just chose to go with a basic no-frills crochet slip stitch join. I will show you how I join them to help minimize lots of tails to weave in.
Joining Crochet Squares
Here’s what you need:
- a stack of cluster burst squares from this pattern here
- a coordinating color of worsted weight yarn
- H hook
- tapestry needle and scissors
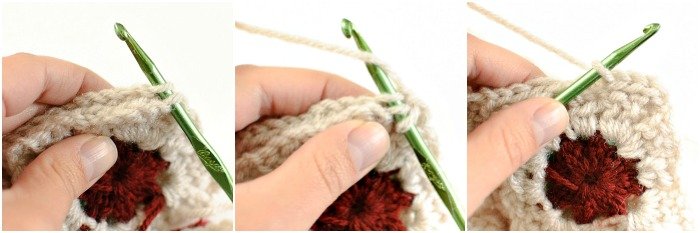
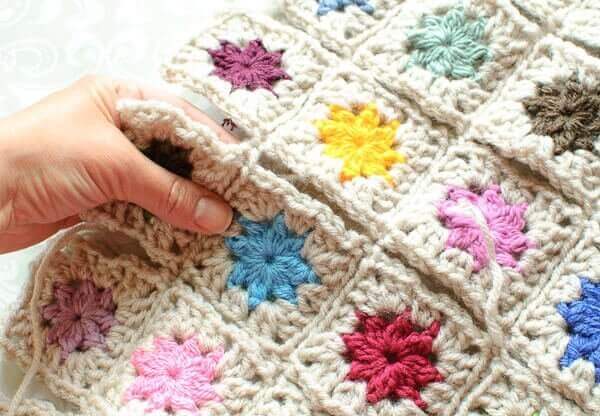
To begin, take your first 2 squares and hold them with right sides facing. Starting at the corner, insert your hook through the top loops only. Yarn over and pull through all the loops on hook (slip stitch complete). Continue working slip stitches through top loops only to next corner. Fasten off.
Continue joining squares in this way until you have a strip that equals the desired width of your afghan. (The dashed red lines in the schematics indicate where squares are joined at each step.)

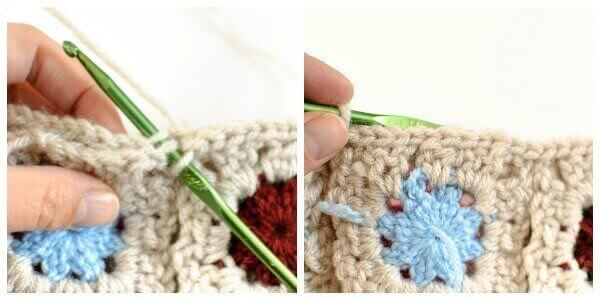
Now we are going to add our second row of squares. Place your next square over the first square from the row below, again with right sides facing. Starting at the corner, slip stitch through top loops only to next corner but this time do not fasten off. Now place your next square over the next square from the row below with right sides facing. Work slip stitches through top loops across squares, and again do not fasten off. Repeat across row.
For now we are going to leave the spaces between the squares in the row unjoined. This way we can go back later and slip stitch up the whole length of the afghan (less weaving, yeah!).

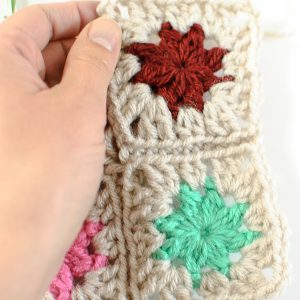
You will see how nice and neat the join is between squares … love it!
Continue working your rows as done above until you reach the desired length for your afghan.

As you can see, we now need to join squares up the length of the blanket.
To do this, simply fold each column of squares over the one next to it so right sides face each other. Now slip stitch through the top loops only again connecting squares all the way up the length of the blanket. Continue this until each column is joined. Voilà! Now just weave in those ends and you are done!

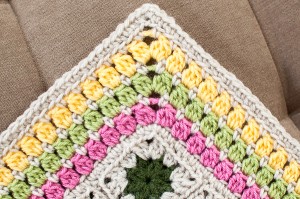
Once you have all your squares joined, be sure to check out my Cluster Burst Crochet Edging Pattern for the perfect finish to your afghan.
How did you do? I would love to see your finished afghans! Feel free to post them up on my Facebook page here.

I am crocheting a granny square blanket with different colors to create a pixelated image. Any suggestions on how to join squares that are two different colors without being able to notice the seam?
What do you mean by crochet thru the top loops only? Do you mean the outermost loops? Can’t tell from the picture which loops you mean. I hope you can help….
Yes.
Thanks for a great tutorial. My grandmother taught me to crochet a granny square when I was a child, but I went on to other crafts as I was growing up and now at the age of 62 I have rediscovered the joy of crochet. Your tutorial was so easy to follow. I am going to join my squares up now and give it a go. Cheers. Liz…
Thank you for sharing this joining method! Finally, one that makes sense and I can easily do as a lefty. The JAYGO methods leave me in all kinds of a mess when I try to adapt. 🙂 I have a bag of granny squares I can’t wait to try this on!
I am so glad you found it helpful, Melanie!
Thank you for the great tutorial! So pretty!