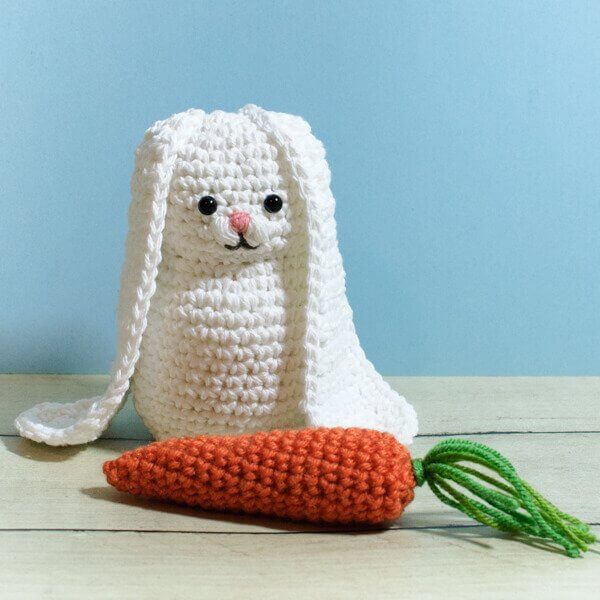
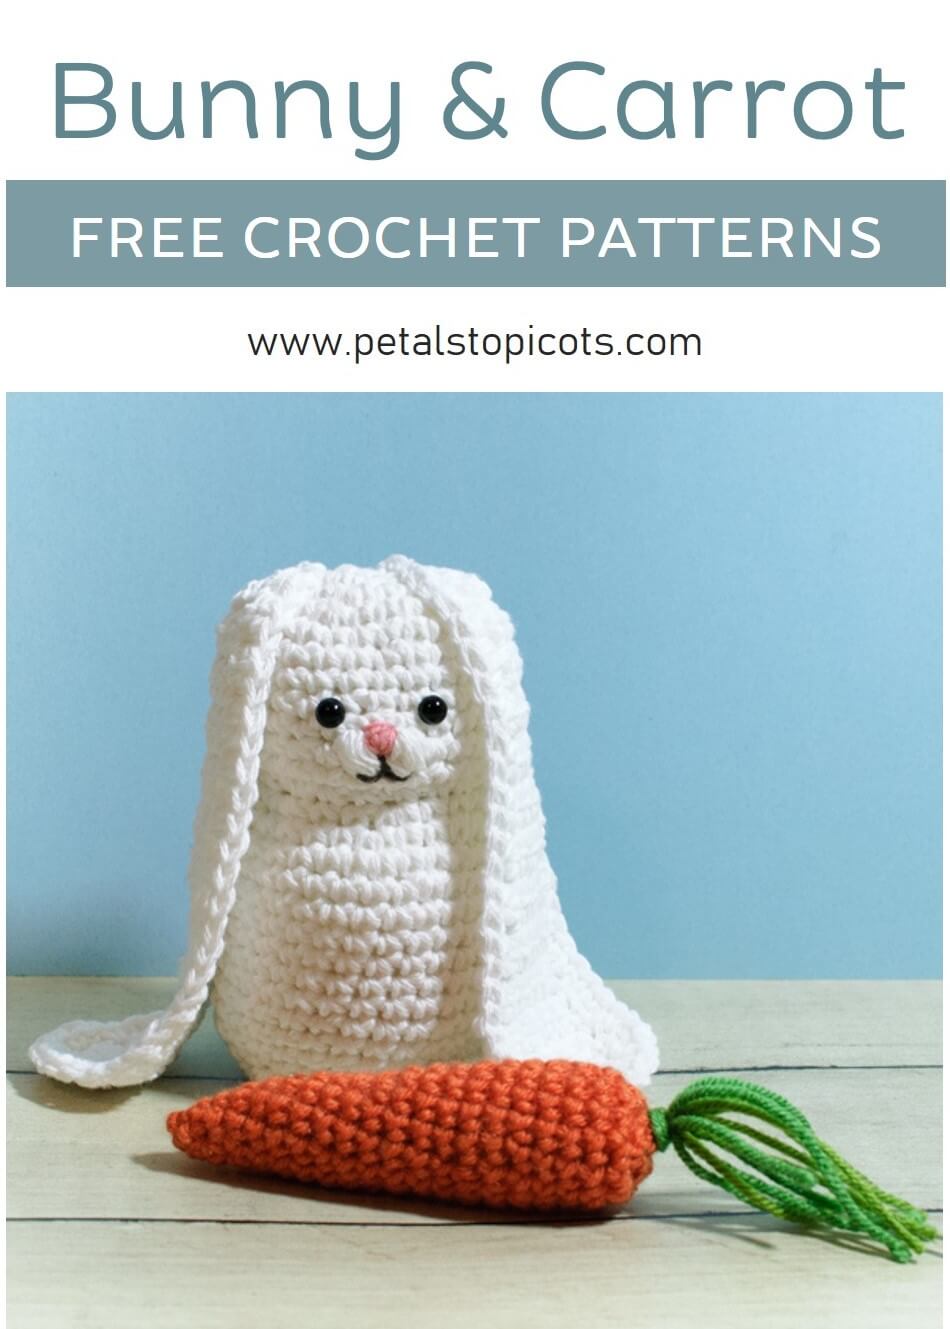
I love this adorable crochet bunny with it’s long floppy ears! I have lovingly named her Flopsy after the character in Beatrix Potter’s classic The Tale of Peter Rabbit. I have a feeling that Flopsy is going to stay around long after Easter has passed. And of course every bunny needs a carrot!
Bunny and Carrot Crochet Patterns
Here is what you will need:
- white worsted weight yarn, approx. 150 yds
- orange worsted weight yarn, approx 25 yds
- US H-8/5 mm hook
- small amounts of lightweight pink, gray/black, and green yarn
- fiberfill stuffing
- a pair of 8 mm safety eyes
- stitch markers, 2-in. pom pom maker (optional), yarn needle, and scissors
Resources and tutorials you may find helpful in following this free pattern: Crochet Abbreviations, U.S. to U.K. Crochet Conversion Chart.
Add this pattern to your Ravelry library.
Also available a convenient, ad-free pdf download here.
Finished bunny measures approx. 6 in. tall; carrot measures approx. 5 in. long.
Bunny
Body
The body is worked in a continuous spiral; do not join at the end of each round. Use a stitch marker to mark the first stitch in each round.
Special stitches:
3 half double crochet cluster (3hdc-cl): Yarn over, insert hook into stitch, yarn over again and pull through stitch, repeat 2 more times (7 loops will be on hook), yarn over and pull through all loops on hook.
2 double crochet cluster (2dc-cl): Yarn over, insert hook into stitch, yarn over again and pull through stitch, yarn over and pull through 2 loops on hook, repeat one more time (3 loops will be on hook), yarn over and pull through all loops on hook.
With white yarn, make a magic ring (as an alternative to the magic ring, you can ch 4 and join with a slip stitch in furthest chain from hook to form a ring).
Round 1: Ch 1, work 6 sc in ring — 6 sts.
Round 2: Work 2 sc in each st around — 12 sts.
Round 3: *Work 2 sc in next st, 1 sc in next st, repeat from * around — 18 sts.
Round 4: *Work 2 sc in next st, 1 sc in each of the next 2 sts, repeat from * around — 24 sts.
Rounds 5 through 9: Work 1 sc in each st around — 24 sts.
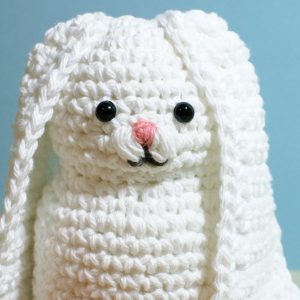
Round 10: Work 1 sc in each of the next 11 sts, 3hdc-cl in each of the next 2 sts, 1 sc in next 11 sts — 24 sts.
Round 11: Work 1 sc in each st around — 24 sts.
Using a yarn needle and a length of pink lightweight yarn, embroider an inverted triangular nose between the 2 3hdc-cl from Round 10. Switching to the gray/black yarn, embroider a thin mouth coming down from the nose and under each 3hdc-cl. Attach safety eyes at outer edges of each 3 hdc-cl between Rounds 8 and 9. Use photo below as a guide. Stuff head with fiberfill stuffing taking care not to overfill.
Round 12: *Sc2tog, 1 sc in each of the next 2 sts, repeat from * around — 18 sts.
Round 13: *Work 2 sc in next st, 1 sc in each of the next 2 sts, repeat from * around — 24 sts.
Round 14: *Work 2 sc in next st, 1 sc in each of the next 3 sts, repeat from * around — 30 sts.
Rounds 15 through 24: Work 1 sc in each st around — 30 sts.
Round 25: *Sc2tog, 1 sc in each of the next 3 sts, repeat from * around — 24 sts.
Round 26: Work 1 sc in each of the next 10 sts, 2dc-cl in each of the next 2 sts, 1 sc in next 3 sts, 2dc-cl in each of the next 2 sts, 1 sc in next 7 sts — 24 sts.
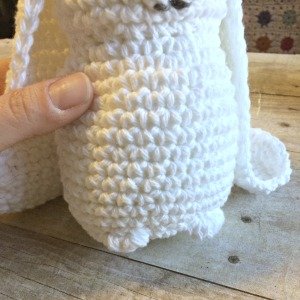
Round 27: *Sc2tog, 1 sc in each of the next 2 sts, repeat from * around — 18 sts.
Round 28: *Sc2tog, 1 sc in next st, repeat from * around — 12 sts.
Finish stuffing body with fiberfill stuffing.
Round 29: Sc2tog around — 6 sts.
Fasten off leaving a length of yarn of about 6 in. Using a yarn needle weave yarn through stitches to close up hole. Weave in ends.
Using white yarn, make a pom pom of about 2 in. in diameter. Sew pom pom to the bottom center of the back of your bunny.

Ears (make 2)
With white yarn, ch 4.
Row 1: Work 1 sc in 2nd st from hook and each ch across, turn — 3 sts.
Row 2: Ch 1, work 2 sc in 1st st, 1 sc in next st, 2 sc in last st, turn — 5 sts.
Row 3: Ch 1, work 2 sc in 1st st, 1 sc in each of the next 3 sts, 2 sc in last st, turn — 7 sts.
Rows 4 through 25: Ch 1, work 1 sc in each st across, turn — 7 sts.
Row 26: Ch 1, sc2tog, 1 sc in each of the next 3 sts, sc2tog, turn — 5 sts.
Row 27: Ch 1, sc2tog, 1 sc in next st, sc2tog, turn —3 sts.
Work a sc edging around each ear. Fasten off. Using a yarn needle and length of white yarn, sew ear to each side of head between Rounds 2 and 3. Weave in ends.
Carrot
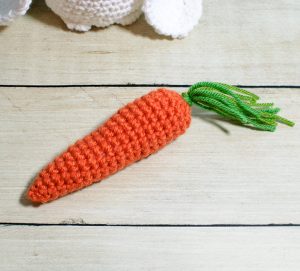
The carrot is worked in a continuous spiral; do not join at the end of each round. Use a stitch marker to mark the first stitch in each round.
With orange yarn, make a magic ring.
Round 1: Ch 1, work 4 sc in ring — 4 sts.
Round 2: *Work 2 sc in 1st st, 1 sc in next st, repeat from * around — 6 sts.
Round 3: Work 1 sc in each st around — 6 sts.
Round 4: *Work 2 sc in next st, 1 sc in each of the next 2 sts, repeat from * around — 8 sts.
Rounds 5 and 6: Work 1 sc in each st around — 8 sts.
Round 7: *Work 2 sc in next st, 1 sc in each of the next 3 sts, repeat from * around — 10 sts.
Rounds 8 and 9: Work 1 sc in each st around — 10 sts.
Round 10: *Work 2 sc in next st, 1 sc in each of the next 4 sts, repeat from * around — 12 sts.
Rounds 11 through 13: Work 1 sc in each st around — 12 sts.
Round 14: *Work 2 sc in next st, 1 sc in each of the next 5 sts, repeat from * around — 14 sts.
Rounds 15 through 20: Work 1 sc in each st around — 14 sts.
Stuffing carrot with fiberfill stuffing.
Round 21: Sc2tog around — 7 sts.
Fasten off leaving a length of yarn of about 6 in. Using a yarn needle weave yarn through stitches to close up hole. Weave in ends.
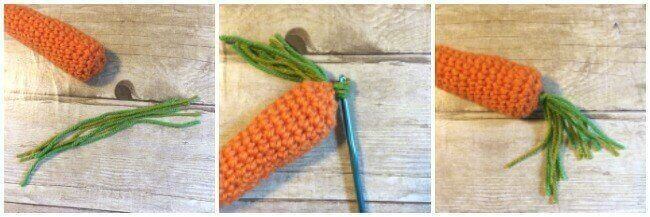
Cut about 5 8-in. lengths of green yarn. Fold the lengths in half to form a loop on one end. Use your hook to pull looped end through the top of your carrot and once through pull the cut ends through the loop and pull gently to secure.
Click here for more Free Easter Crochet Patterns.


I don’t know how can you do this. You have a creative mind. Thanks for sharing this idea. The bunny is so cute.
What a cutie! Thank you for sharing, I may have to make three! Actually I was wondering if I may share one of your photos? I’m putting together a sort of Easter arts and crafts compilation blog post and would love to include this bunny. I will of course link back to your post!
Yes, that sounds great!! Thanks so much!
Thank YOU! Here’s the result: http://aliciasivert.blogspot.se/2017/04/peppiga-paskprojekt-2017.html
Happy Easter! 🙂
You are very welcome, and it is a great cute pattern, Thank you :0)
There is a typo in round 26 it should say 1 sc in the next 7 not 73 😉 of the body
Thanks for the catch … fixed it 🙂