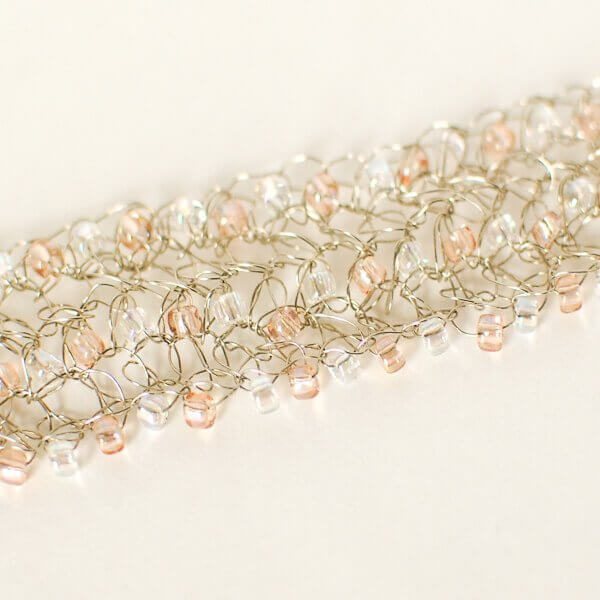
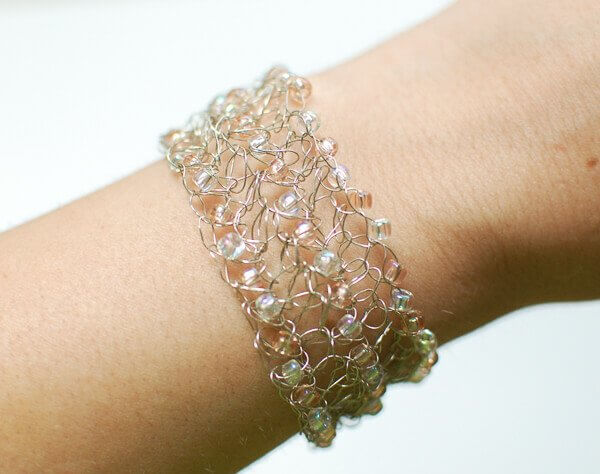
I have been loving the wire bangle I made awhile back and wear it every chance I get! It goes just as nice with blue jeans as it does with a dressy outfit. If you missed it, you can click here for the free wire bangle pattern. So I wanted to try adding some beads to the pattern for a little variation and I love the result!! Here is the beaded wire crochet bracelet pattern if you’d like to try it too …

Beaded Wire Crochet Bracelet Pattern

Here’s what you need:
Resources and tutorials you may find helpful in following this pattern: Crochet Abbreviations, U.S. to U.K. Crochet Conversion Chart.
Add this pattern to your Ravelry library.
Notes: Beads are incorporated into your stitches on your last yarn over of a stitch. To do this, move the bead up to rest next to hook, then yarn over and pull through. For example, when chaining, you would move the bead up to the hook before making each chain. For a single crochet, you would insert your hook into the next stitch as usual and draw up a loop, then move bead up the wire to rest next to the hook, yarn over and pull through the 2 loops on hook.
The number of beads used will depend on how big you make your bangle. You may not use all 120 beads. I tried to overestimate so that you have enough on your wire. My bracelet only used 96 beads and measures approx. 7½ in. in circumference, with a beginning chain of 33.
Before beginning, thread all the beads onto your wire. Incorporating beads into your chain as described above, make a chain a little larger that the circumference of your wrist. Join in first ch to form a ring.
Round 1: Ch 1, incorporating beads into each stitch as described above, work 1 sc in each ch around, join.
Round 2: Ch 1, again incorporating beads into each stitch, work 1 sc in each st around, join.
Snip wire and fasten off as usual. Weave in the wires to secure and then try to fold the ends into themselves to keep them from poking you.


I love the look of this bracelet. But can you tell me what I’m doing wrong? When i make this it twists and curves and doesnt lay flat like yours at all. Help! I’ve tried several times now with the hopes of making several as gifts. I’ve never crocheted with wire before and I’m really struggling!
Hi Kim 🙂 Yes, the wire can definitely be hard to handle sometimes. The beauty of this project though is that it isn’t supposed to look like nice neat stitches.
Wow! What a beautiful bracelet!! I managed to crochet a necklace with wire and beads several years ago and it came out looking pretty good. The only part I had trouble with was the ends of the wire where it connected to the ends of the clasps. I had never done this before and not only did I not know what I was doing, I didn’t have the tools for jewelry – making either.
Now, I have some of the rounded needle nose pliers and two other types of jewelry pliers. I need to give this a “go” again as it was indeed fun to crochet with wire and beads! I love this bracelet!! Your bracelet is just gorgeous! :). Thank you for the pattern too!
________
Lee Ann
Crochetgottaloveit.blogspot.com
OMG, it is so adorable Kara…I love it!! 🙂
Such a cute idea! However, yours looks infinitely better than mine. Mine looks like I decided to spar with a slinky…and lost 😉
Hi Kara, I did making your original pattern, without the beads.. Definately will take some practice. Any tips for keeping the work from getting smooshed as you work it? Thanks much!
Darling bracelet. I haven’t tried crocheting a bracelet since I was a kid. Very, very pretty. I just might have to try it. Thanks so much for the pattern.
Hope you enjoy it, Laura 🙂
So so pretty! I’ve seen those in stores, but never thought to try it myself. Thanks for sharing.
So glad you like it 🙂
I can’t believe that this is crocheted. It’s absolutely gorgeous!
Thank you so much, Kersten!
It is helpful with wire to use a little file on the sharp ends. Also if you actually use wire cutters, make sure the flat side (not the concave side) faces the jewelry, and the angled side faces the coil of wire. then you end up with a flat rather than a pointy end.
Great tip! Thanks so much for sharing 🙂
Kara,
so simple and yet so very elegant. You can wear this bracelet with jeans and a nice shirt or a very formal cocktail dress. It’s great, thanks for the very nice post.
Thanks so much! So glad you like it 🙂
Hi Kara, I always admire your work and this bracelet is no exception, simply elegant and gorgeous and your instructions are easy to follow too, thank you for sharing 🙂
What a sweet comment, Linda! Thank you so much 🙂