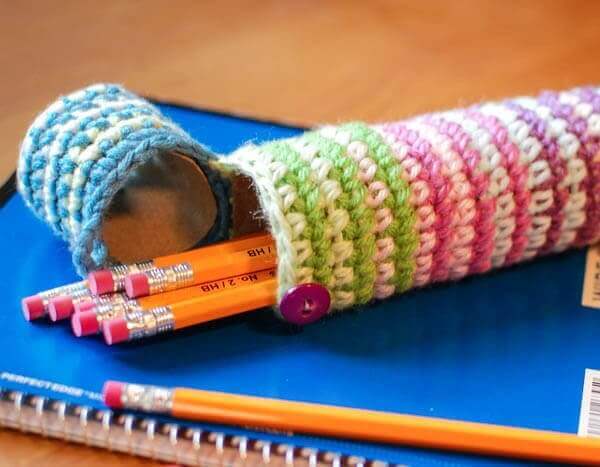
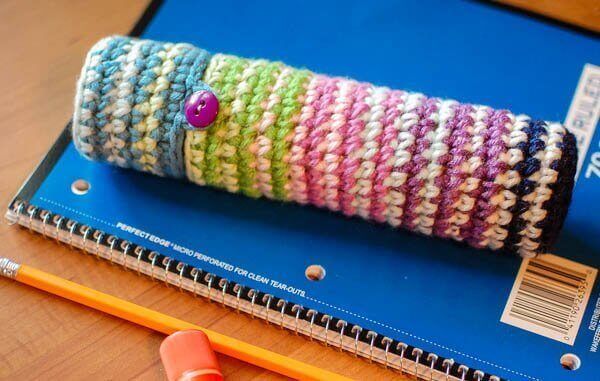
Add a unique and colorful touch to your child’s back-to-school gear with this fun crochet pencil case pattern. Work it up in your child’s favorite colors, school colors, favorite sports teams, or any other combination you can think of! It’s also the perfect project for getting rid of all those little balls of yarn in your stash.
I made mine here with a cardboard paper towel tube but readers have written me about having success using wrapping paper tubes and even PVC pipes for added strength. Great ideas!
Crochet Pencil Case Pattern

Here’s what you need:
- cardboard paper towel tube
- worsted weight yarn from your stash
- US G-6 / 4 mm crochet hook
- 5/8 in. button
- tapestry needle, scissors
Resources and tutorials you may find helpful in following this crochet pattern: Crochet Abbreviations, U.S. to U.K. Crochet Conversion Chart, How to Make a Magic Ring {photo & video tutorial}.
Add this pattern to your Ravelry library.
Cut cardboard paper towel tube into two pieces, one piece 6 in. long and the second piece 2 in. long. Discard remaining section.
Bottom
Make a magic ring (as an alternative to the magic ring, you can ch 4 and join with a slip stitch in furthest chain from hook to form a ring).
Round 1: Ch 1 (does not count as st here and throughout), work 6 sc in ring, join — 6 sts.
Round 2: Ch 1, work 2 sc in same st as join and in each st around, join — 12 sts.
Round 3: Ch 1, work 2 sc in same st as join, 1 sc in next, *2 sc in next, 1 sc in next, rep from * around, join — 18 sts.
Round 4: Ch 1, working in back loops only, work 1 sc in same st as join and each st around, join — 18 sts.
Rounds 5 and 6: Ch 1, work 1 sc in same st as join and each st around, join — 18 sts.
Using the long length of cardboard tube, check your fit. I prefer to then keep the tube placed and continue crocheting around it from here on.
Rounds 7 through 26: Repeat Round 5 until tube is covered, approximately to Round 26 — 18 sts.
Fasten off, leaving a tail of approx. 6 in.
Top
Using the smaller length of tube, repeat Rounds 1 through 11 of bottom or until tube is covered.
Last Round: Sl st in same st as join and into each of the next 8 sts, ch 5 (buttonloop made), Sl st into each of the next 9 sts — 18 sts and ch-5 space.
Fasten off, leaving a tail of approx. 6 in.
Finishing
Line up the joining seams and tails of both parts. Using a tapestry needle and the long tails, sew top and bottom together along 5 sts only forming a hinge on which the top will open. Line up the ch-5 buttonloop made in the last round of the top with your button and sew button into place. Weave in ends.

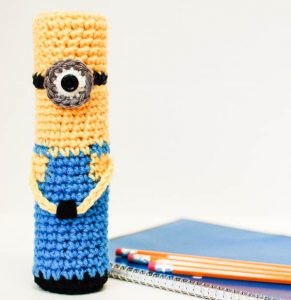
I even used this basic crochet pencil case pattern and customized it to make a cute minion case for my son!
Browse my full gallery of free crochet patterns here.


Wax paper, aluminum foil, plastic wrap, and parchment paper rolls are quiet study. To cut, use a bread knife or a hack saw.
plastic canvas tubes (with ends) make a nice, sturdy alternative. I plan to make 2: one for crochet hooks, 1 for knitting needles. 😊
Good idea 💡 😀 Thank you!!!
This is so cute. I see it storing my crochet hooks. Thank you so much for sharing.
I made one for myself for that purpose too! 😉
Would love to have the pattern for the minion pencil case holder. Can you provide that?
Thanks so much!!! <3
Hi Betty 🙂 Here you go …
Here’s what you need:
cardboard paper towel tube
worsted weight yarn, small amounts of black, blue, yellow, white, and gray
G hook
½ in. black button
tapestry needle, scissors
Cut cardboard paper towel tube into two pieces, one piece 6 in. long and the second piece 2 in. long. Discard remaining section.
Bottom
With black, make a magic ring.
Round 1: Ch 1 (does not count as st here and throughout), work 6 sc in ring, join — 6 sts.
Round 2: Ch 1, work 2 sc in same st as join and in each st around, join — 12 sts.
Round 3: Ch 1, work 2 sc in same st as join, 1 sc in next, *2 sc in next, 1 sc in next, rep from * around, join — 18 sts.
Round 4: Ch 1, working in back loops only, work 1 sc in same st as join and each st around, join — 18 sts.
Round 5: Join blue, ch 1, work 1 sc in same st as join and each st around, join — 18 sts.
Using the long length of cardboard tube, check your fit. I prefer to then keep the tube placed and continue crocheting around it from here on.
Rounds 6 through 15: Repeat Round 5 — 18 sts.
Round 16: Ch 1, work 1 sc in same st as join, 1 sc into the next st changing to yellow on last yarn over, work 1 sc in each of the next 5 sts changing to blue on last yarn over of fifth st, 1 sc in next 4 sts changing to yellow on last yarn over of 4th st, work 1 sc in each of the next 5 sts changing to blue on last yarn over of fifth st, 1 sc in next 2 sts around, join — 18 sts.
Rounds 17 and 18: Repeat Round 16 — 18 sts.
Round 19: Ch 1, work 1 sc in same st as join and each of the next 6 sts changing to yellow on last yarn over of the sixth st, work 1 sc in each of the next 4 sts changing to blue on last yarn over of fourth st, 1 sc in next 7 sts, join — 18 sts.
Round 20: Join yellow, ch 1, work 1 sc in same st as join and each st around, join — 18 sts.
Rounds 21 through 26: Repeat Round 20 — 18 sts.
Fasten off, leaving a tail of approx. 6 in.
Top
Using the smaller length of tube and yellow yarn, repeat Rounds 1 through 10 of bottom.
Round 11: Join black, ch 1, work 1 sc in same st as join and each st around, join — 18 sts.
Fasten off, leaving a tail of approx. 6 in.
Eye
With white, make a magic ring but do not close up the whole.
Round 1: Ch 1, work 12 sc in ring, join — 12 sts.
Round 2: Join gray, ch 1, work 1 sc in same st as join and each st around — 12 sts.
The center of the eye (the magic ring) is also the buttonhole. Make sure to test the size with your button. The button should go through easily but without slipping through. Use the tail of your yarn to adjust the size of the ring for your button. Once you get the correct size, use a tapestry needle to weave the tail back and forth through the backs of your stitches to secure it.
Finishing
Line up the joining seams and tails of both parts. Using a tapestry needle and the long tails, sew top and bottom together along 5 sts only forming a hinge on which the top will open. Find the center of your front and sew the button on Round 11 of the top piece. Line up the buttonhole (the eye) with the button and sew the bottom of the eye to the bottom piece. Weave in ends.
To make arms, join yellow to center yellow stitch of Round 17 of bottom, chain 17, join to center yellow stitch at other side of Round 17. Using a tapestry needle and black yarn, make a few overlay stitches to secure the arms to the front of the case.
hi!
i am writing this from Japan!
I want to know how to make the one’s of the Minions.
i wantyoutoreplyme.
please!
(I am 13.i want to make it in this summer)
this English might be weird but sorry.
i am Japanese.
I did use the pvc pipe, makes the case very sturdy. I also put tacky glue on the pipe as I put the cover on, does’ t slip or twist. Thank you for the fun pattern. Rita Wright
Would also work well with dp knitting needles: one case for each size!
Thanks so much for featuring me!!
This is so so cute, and cool . This would also be a good idea for putting all kinds of candies in it and, giving it to someone for a holiday gift. Great Job!
Wrapping paper rolls are thicker and would work too.
Great idea, Jade!
LOVE THIS! I need to make one today…lol My only question is, do you have any issues with the paper towel roll bending, being smooshed etc. They are pretty thin and flimsy and I would worry about that. I guess, it would be easy enough to switch them out as needed, just curious. I thought about possibly using some PVC for a more permanent case 🙂
Did you use any glue to secure it to the cover?
Nope, I just made sure the crochet part was a little snug around it.
I was wondering how they would hold up too. So far so good. I think the fact that it is filled with pens and pencils keeps the tube from collapsing. I figured I can always switch it out if it gets too bad, but your PVC is a good idea!
I LOVE this idea! Can’t wait to get started on one for my daughter! Thanks for the pattern.:)
I agree with the crochet hook holder people! Very cute!!!
This is a neat idea and very pretty! I am like Lee Ann it would make a nice crochet hook holder especially the ones you might be taking with you some place to work on a crochet project!
Thanks for sharing it with us!
Indeed !!!!
Hug
Anna
Love it! I made it right away for my daughter, I couldn’t wait. She loves it too. Thanks for sharing 🙂
Fabulous 🙂 Perfect for my crochet hooks too!!
Awesome, I love this! I’m thinking thus would be a great crochet hook holder! 🙂 Thanks for posting!
___
Lee Ann
Crochet…Gotta Love It! Blog
Hello Kara,
The pencil case is really really nice! Thanks for sharing your pattern:)
So Cute! You could use some scrapbooking paper to line the inside of the tube to make the inside just as pretty 🙂
This is so lovely ! thanks for sharing the pattern , I can also see this being used as a make-up brushes storage.
xEva
Your pencil case looks very sweet!!:) every month, I throw out couple of kitchen tissue cardboard rolls. But I have saved a few long back in my ‘best out of waste’ stuff. Will try someday.