
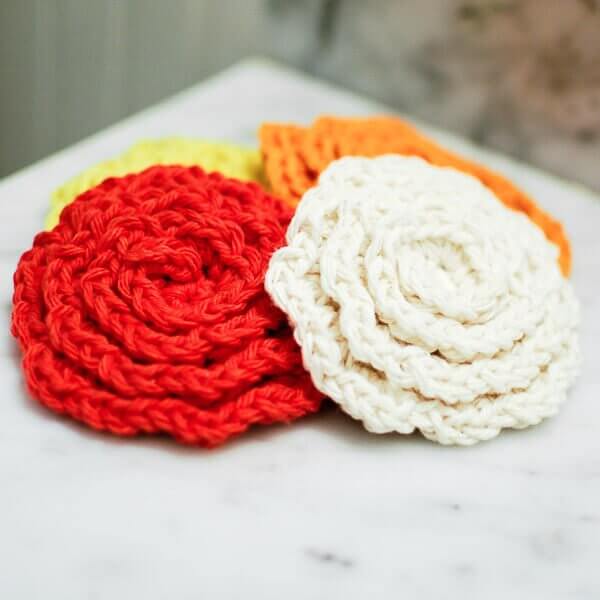
These crochet flower face cleansing pads add a pretty flare to your beauty routine. They are attractive enough to be displayed while being soft and absorbent enough to cleanse. They also make for a great gift when paired with a scented soap and lotions.
Want to make some of your own?
They are lots of fun and quick and easy to do!
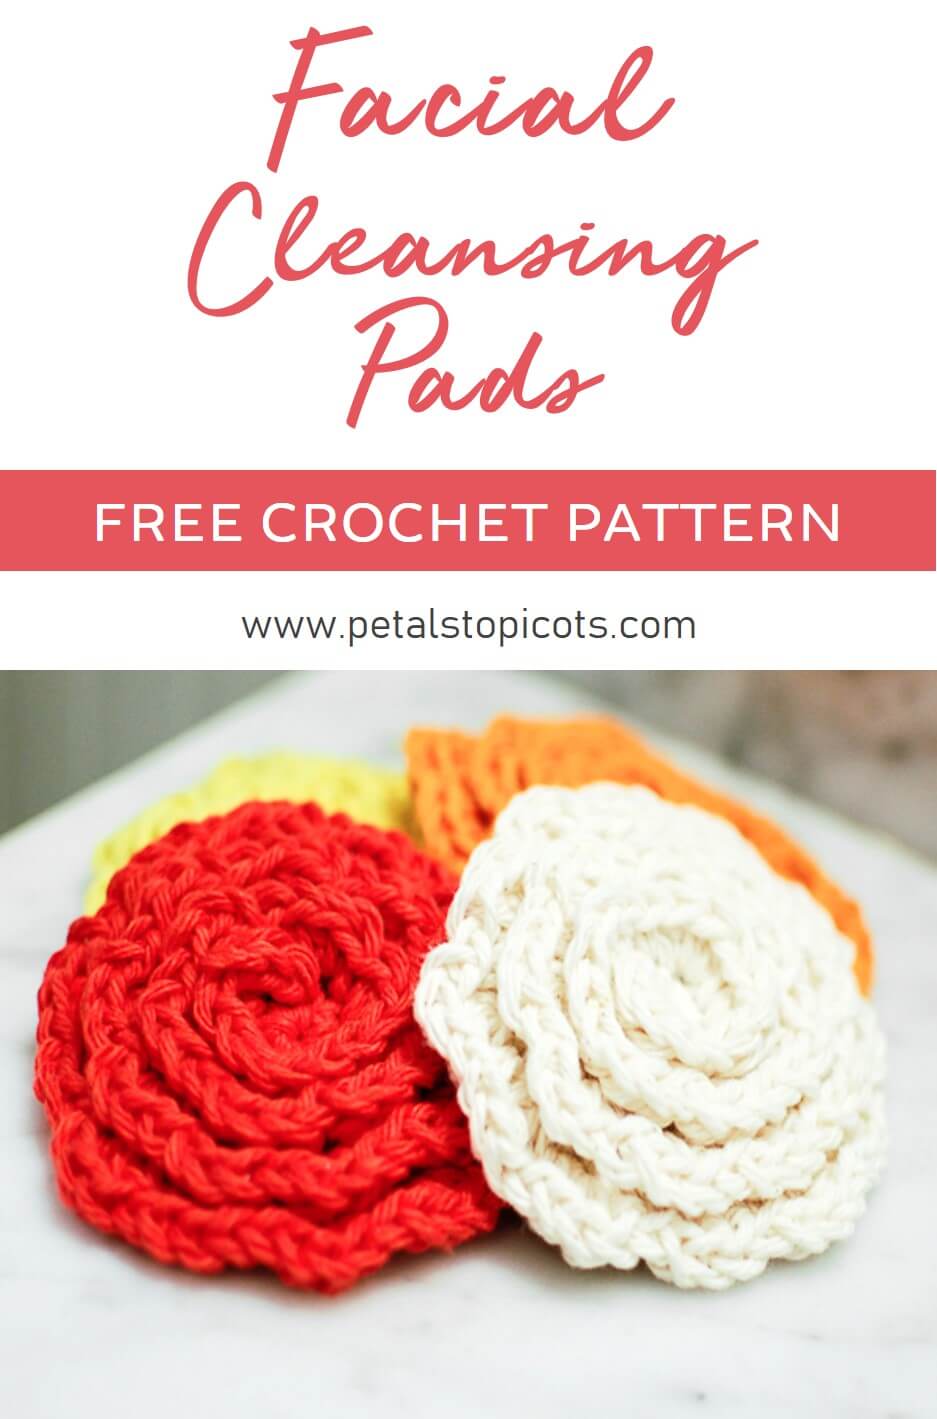
Crochet Flower Face Cleansing Pads
Here’s what you need:
- worsted weight cotton yarn (I used Lion Brand Kitchen Cotton)
- US H-8 / 5 mm crochet hook
- tapestry needle
Resources and tutorials you may find helpful in following this pattern: Crochet Abbreviations, U.S. to U.K. Crochet Conversion Chart, How to Make a Magic Ring (see video below).
Note: These Crochet Flower Face Cleansing Pads are worked in unjoined rounds. Use a stitch marker to keep track of rounds.
Add this pattern to your Ravelry library.
Make a magic ring.
Round 1: Ch 1 (does not count as st), work 6 sc in ring, do not join here and throughout — 6 sts.
***Work Rounds 2 through 4 in the back loops of stitches only.***
Round 2: Work 2 sc in each st around — 12 sts.
Round 3: *2 sc in next, 1 sc in next, rep from * around — 18 sts.
Round 4: *2 sc in next st, 1 sc in each of the next 2 sts, rep from * around — 24 sts.
Fasten off. Join yarn in first unworked loop from Round 1, work 1 sc in same loop as join, *3 hdc in next, 1 sc in next, rep from * around, Sl st in next and fasten off. Weave in ends.
you may Also enjoy …
- Crochet Washcloth and Bath Mitt Set
- Free Crochet Dishcloth Patterns
- Crochet for Baby
- Crochet Afghan Patterns

I converted this to make a dish scrubby. I used a G hook, went up to 2 sc then sc nxt 4 with even rows in back loop only. I then did c2tg then sc & repeat til got to middle. Used tapestry needle to tie tog. Then went back like directions on even rows to do the sc then 3hdc & repeat through towards middle. I added a leaf. Tyvm!
For anyone as confused as I was trying to start this: it’s a two-part pattern. The first four rows are creating a flat base; the (3hdc, s) loop is worked into the unused front loops of said base to form the petals. Hope this makes things a little easier for people!
Thank you so much! I kept looking at mine wondering why it wasn’t coming out right before ai even got to the 3hdc’s.
Thank you!!! Makes much more sense now!! 😉
Thank you so much.
I am very beginner. What SC, hdc, SI st stand for?
Thank you in advance for explaining.
Thanks so much for your beautiful pattern. I got it. I love it a lot. I’m ginna make more ad gift fro friends.
Not a very well written pattern. You should have said to continue around on each row. I am not a beginner but I had a few people who are ask me what they do after they finish the first row of hdc’s. Yes, I know for you it is a no-brainer, but for those who are just starting out, you should have explained that.
I love this pattern! I’m going to use it to add flowers to a baby blanket for a baby shower! So quick and easy!
The ending of round 4 makes absolutely no sense to me lol! I’ve tried to do it so many times but I’m so confused.. I guess I’m doing this completely wrong.. I really wish there was a video for me to see
I started out intending to follow the pattern exactly, didn’t quite end up that way but here’s my version:
https://m.facebook.com/story.php?story_fbid=10214483410052181&id=1027670194
After the first fasten off, I was then lost! Don’t understand where that last row goes after you fasten off, or why?! Do you have a tutorial?
Hi Diane 🙂 After fastening off at the end of Round 4, you will rejoin your yarn to the center of your flat circle in the innermost loop, or the front loop of the very first stitch you made. Then continue working in the front loops of all the stitches around. Hope that helps!
I am having so much trouble with this EASY pattern!!! At the end of round 1 it says to not join so my rows end up in a semi circle. To join the last stitch of row 4 with the loose yarn in first stitch creates an unfinished side, like a conch shell. There is also the big loop from the magic ring. Are we supposed to pull that taut to create a tight circle in the middle? Please help, I don’t want to give up! :-))
It sounds a little like you might be turning to work as you would in rounds, is that the case? If so, then that is why you are getting a semicircle. Instead, do no join at the end of Round 1, but instead, continue working in the round by working your first stitch of Round 2 directly into the first stitch from Round 1. Make sense?
For the life of me…i have no idea where my first unworked loop is after completing r4. Should i have used a stitch marker at the beginning?
Hello 🙂 The first unworked loop is the one at the very center of your circle. Then you would work your way around outwards. Hope that helps!
Can you show a picture of what it looks like before you tie off?
Unfortunately, I do not have a photo.
I’m a knitter new to crochet – I’ve tried this 4 different times, but mine keep coming out pretty flat. I’m not understanding what you mean by “back loop.” Is there a video tutorial for this?
I see others have had the same problem… I will try again… Thanks.
Be sure you are doing this part too 🙂 … Fasten off. Join yarn in first unworked loop from Round 1, work 1 sc in same loop as join, *3 hdc in next, 1 sc in next, rep from * around, Sl st in next and fasten off. Weave in ends.
I think problem after row four is to crotchet in front stitch to make it stand up ru
ffles. Rows 2-4 in back of loop..last round after four in front loop ..worked for me
super i like it 🙂
I have been crocheting for a long time. I know this is an easy pattern. When I make mine they come out flat. I am going through the back loop. Yours look so nice and fluffy. What am I doing wrong. I have tried different sized hooks. Thanks so much.
Hi Jean 🙂 Are you working the last part of the pattern? “Fasten off. Join yarn in first unworked loop from Round 1, work 1 sc in same loop as join, *3 hdc in next, 1 sc in next, rep from * around, Sl st in next and fasten off. Weave in ends.”
Thank you so much for taking the time to respond to me. I am adding the last row. My middle part does not stand up like yours looks like in the picture. I just had some peaches and cream with me on vacation. Could it be the yarn? Thanks.
How fun! I don’t do much crocheting anymore because it hurts my hands and wrists after a bit, but these are calling me to do some again. Would be quick and easy and would make great gifts! Love, love, love these! Thanks for sharing. <3
Dear Kara, l just had to tell you how cute and practical these face scrubbies are. I must admit my dislexic brain had a hard time getting the rejoin.. But when l finally got it…… I’ve made a dozen of them. Thank you so much for sharing the pattern😉
So happy to hear that, Diane!!
Love this pattern! I think I’ll make several for Christmas presents.I wanted to purchase the supplies from somewhere to help support your blog. But I was unable to find the affiliate links.
Hello, I can only get up to round four for your crochet flower cleansing pad. Is there a link or something that I am missing on your page? I click on print or pdf and nothing happens. I am finally getting around to trying to make this. I am new to crocheting but it looks as if it is something I could definitely do. Thanks
Are you continuing on with this part? … “Fasten off. Join yarn in first unworked loop from Round 1, work 1 sc in same loop as join, *3 hdc in next, 1 sc in next, rep from * around, Sl st in next and fasten off. Weave in ends.”
Hello! Are these supposed to be small or big? When I made them, they turned out to be pretty small. How big are the ones you made? Thank you! I love the pattern.
Mine are about 3 inches in diameter.
Kara – 3 inches is about right. That’s why I turned them into “flower” hair twisties by adding some beads and hair elastics.
Deb
I have tried this pattern i dont know how many times but no matter what it never looks anything but like a flat spiral even when i used just the back loop like the pattern specified. i started with a magic loop and did everything but it stayed flat. Is it my yarn? I’m using sugar and cream 100 percent cotton yarn and it just wont work! The only time it started to raise is when i did back post single crochet
Hi Tianna 🙂 Are you continuing on with this part? “Fasten off. Join yarn in first unworked loop from Round 1, work 1 sc in same loop as join, *3 hdc in next, 1 sc in next, rep from * around, Sl st in next”
Love these! Added a hair twistie for my granddaughter to use as a ponytail holder. Since they are a bit small, it would/will be easy to make it bigger by just continuing the base until you get the size you want.
I made some of these for my Mom to add to Easter bags. I made a plain circle and sewed a back to these so you just put two fingers in the “pocket”. I think it will make them a bit easier to use. Thanks for such a cute pattern!
http://www.crochetville.com/community/topic/151040-rose-face-pads/?p=2625104
Great idea, Michelle!
So very lovely pattern ,Thank u so much
Thank you 🙂
Great little idea. Quick and easy. And it’s great for both a facial puff and an embellishment. I’m even thinking of trying this in wire as a brooch. Here’s a simple little add on you may want to consider for the facial puff. A little handle to slip over the fingers.
Leaving a tail for sewing, CH 9; SC in 2nd ch from hook and each ch across; CH 1; turn; SC in each sc across; finish leaving a tail for sewing.
With a tapestry needle, sew the ends of the strip to the unused loops of the final round. Weave in ends and trim.
I only just made a couple but I plan on putting up pics for my Facebook followers a bit later (www.facebook.com/drdcreations)
Thanks for a neat stash buster project.
Great suggestion!
hi,
mine didn’t turn out right. it just looks flat. am i missing something?
diane
Did you do the second part where you join the yarn to the unworked loops? That is what adds the ruffle flower design. Hope that helps 🙂
hi,
do i complete rows 1-4 and then fasten off?
diane
Yes, fasten off after Round 4 and continue as follows …
Fasten off. Join yarn in first unworked loop from Round 1, work 1 sc in same loop as join, *3 hdc in next, 1 sc in next, rep from * around, Sl st in next and fasten off. Weave in ends.
hi,
how do i add the extra loops if i don’t use the magic circle?
diane
Hi Diane 🙂 The “unworked loops” are not effected by the magic ring at all. If you don’t want to use the magic ring, you can chain 2 and then work the first round in the second chain from the hook. The rest of the pattern will be exactly the same.
I love this pattern! Thanks so much for sharing it. As a little “thank you”, I posted about the pattern on my own blog here:
http://salutationscrochet.blogspot.com/2013/08/crochet-flower-cleansing-cloths.html
Hi!! Thanks for this awesome tut. But I was just wondering what the “first unworked loop from round one” meant… Could you describe which loop that would be? Or send me a picture? Please reply ASAP. Thanks soo much! I look forward to making these 🙂
Hi Kaitlyn 🙂 When you work the circle for the first part, you are only working the stitches in the back loop. This leaves the front loop free for the second part in which you would join your yarn into the first free loop at the center and then work around. Hope that helps!
Oh, thanks so much!! Now I’ll make a ton of these for me and daughters!! Thanks for the quick reply~~ 🙂
Can you pleas e tell me if their is a way to not ise the magic circle I find it hard to control with my 60 year old hands. Thank you mrs. Sherry placek
Hi Sherry 🙂 For this particular pattern, you can ch 2 and then work the first round of stitches into the 2nd chain from hook. Hope that helps!
I really like this pattern and i knows its super easy to make , but when i make it doesnt swirl like a rose, i dont understand this step about joining,where am i to go if i dont join?
Round 1: Ch 1 (does not count as st), work 6 sc in ring, do not join here and throughout — 6 sts.
Hi Jamie 🙂 Instead of joining at the end of each round, you just continue crocheting in a spiral. In other words, just start the next round as you usually would but without joining the previous one. This will give you the swirl effect. Make sense?
I love this pattern. I found it pinned on Lion Brand’s Pinterest page.
I will be linking to this post from my blog on Tuesday, July 16, 2013.
Thank, Debby
historicneedlecrafts.blogspot.com
knittydebby.etsy.com
So glad you like it! Thanks for sharing it on your blog 🙂
Not much of a “crocheter” so anyone able to convert to knitting?
Sorry, Gretchen … wish I could help 🙁
I love this project! I’ve featured it on my latest installment of Feature Your Fibers! Li’d love for you to come by and check it out (and also link anything new you’ve created!)
~ Sarah
Thanks so much, Sarah! I just linked up 🙂
Thank you for writing such a clear pattern, I have made four just this morning for my sons teachers end of the year gifts!
I am so glad you liked it 🙂
I love the star pattern you have in the center of the top banner at your website. Do you have the instructions for that star pattern? I really want to try it. Thank you in advance for your help.
Hi Nancy 🙂 Those are African flower motifs. I don’t have a pattern for the posted here, but there are a bunch of patterns floating around online that you should be able to find pretty easily. For my afghan, I didn’t work the last round of the pattern that makes them into a true hexagon, instead I joined them as is to try to make them look more like flowers. Hope this helps 🙂
Such a cool and awesome idea!!! and pretty too 😉
Thanks, Ana 🙂
By the way, I LOVE your new website! I can tell you switched to WordPress, didn’t you? It’s so nice!
I did!! And so glad you like it 🙂
This is gorgeous Kara! I love that you made them for your girls. Thanks for sharing at Hookin On Hump Day!
Thanks, Sara!
These are really cute n useful
Thanks, Pearlin 🙂
So I am totally confused… It all starts with the do not join after the first 6 stitches and ends with that whole last part after round 4… I know this is lame, but do you think you could add some more pics since you can’t do a video? Don’t I have to join somehow to start round 2? Would you advise leaving an extra lond tail from the magic circle to do the last step? I am going to try it again tomorrow, maybe my brain just needs a rest…
Hi Kate :). This circular pattern is worked in a spiral so you do not join at the ends of the rounds. You just work the next rows’ stitches right in the ones from the previous round. Rounds 1-4 of the pattern are the base of the pad. The flower effect is put on after Round 4.
Thank you so much for your reply, I am sure you are very busy and for you to take the time to try to help me out really made my day. They turned out great, and were much easier to do than my brain was originally making them… Have a great day!
It was no problem at all! I am glad that I was able to help and that you figured it out and are happy with them 🙂
Thank you for sharing the pattern!
Hello,
Thank you so much for your party!
I was wondering if I could share your post on my blog, It’s so great!
Of course with a direct link to your blog.
Thank you.
Glad you like it!! That would be great :). You are welcome to reprint one of the pictures but please link over to my post for the pattern. Thanks!!
Are they suppose to be small? Because mine turned out pretty small after I finish round 4. Also I’m not quite getting what to do after that. Yours look great though, they’re supper cute.
Hi Francheska 🙂 After Round 4 you should have a flat circle about 2 1/2 inches in diameter. Then, once you work the rest of the pattern into the front loops of the rounds, the flower should be about 3 1/2 inches. Hope that helps 🙂
These are awesome but I need a video tutorial to fully understand the pattern could you help me with this? Thanks
Unfortunately I don’t have a video tutorial at this time, but I can try to help. Which part are you having trouble with?
these are so cute!!!!!! I’ll have to give them a go
Hope you enjoy them 🙂
These are Great! I make several different face cloths and scrubbers,,, but these have to be the cutest!
Wow, so cute!! ♥ Some time ago I made a little net full of crocheted cleansing pads for a penfriend, but they were simple plain ones (only in many different colors). I really must keep your pattern in mind for the next time because these flowers are so much prettier! Thanks for sharing :-))
Have a nice day!! Nata xxx
Hope you enjoy it, Nata 🙂
So lovely flowers!
Have a wonderful week!
Hugs from Portugal,
Ana Love Craft
http://www.lovecraft2012.blogspot.com
Thank you, Ana 🙂
These look fab! Do they wash up ok? Going to try them soon x
Yes, they come out of the wash great … I wash them with my towels 🙂
Great
Thank you 🙂
Lovely flowers…nice pattern…and quick.Happy week. 🙂
Thank you, Luna 🙂
These are really pretty!
Thanks so much, Casey!
These are too cute! This would be a great stash buster project. I have lots of bits of cotton yarn that need to be turned into something 🙂
Absolutely!
Thanks. I’ve been looking for some that were not just flat! These are great!! 🙂
Hope you enjoy them 🙂
Kara, this pattern is AWESOME! I’m going to share it on FB! 🙂
Thanks so much, Marilyn 🙂
Wow, these look great! A perfect little cotton yarn project. Thanks!
They were so much fun to make too 🙂 Thanks, ChiWei!