Although this particular post on how to use IFTTT as a social media scheduler may only be of interest to other bloggers and marketers, IFTTT definitely has functions that can help automate repetitive tasks for just about anyone.
To put it simply, IFTTT (short for “If This Then That”) is a free service that connects different apps and devices so that when an action is triggered in one of your apps it sets off a response in another. Let me start off by stating that I have no affiliation whatsoever with IFTTT … I’m not an affiliate, they didn’t sponsor this post, and I get no financial gain whatsoever. I’m just a long time user who found a service that works for her and wants to share.
Here are a few of the everyday things you can set up …
- receive a text of your local weather each morning
- receive a text reminder before an event you’ve set up in Google calendar
- get an e-mail when an item is listed on craigslist for a search you specify
- automatically back up photos from your cell phone, Instagram, or Facebook to a service like DropBox or Google Drive
- control smart devices in your home and a bunch of other techy things that are way over my head
So if you’re not a blogger or a marketer interested in automating your social media scheduling, definitely go check out the other features. If you are a blogger or marketer, stick around and let’s dive in!
How to Use IFTTT as a Social Media Scheduler
Social media scheduling is one of the most talked about topics in many of the blogger groups I’m in. As bloggers, we are always trying to find services that take care of this task easily and efficiently and within our budget.
Before using IFTTT for social media scheduling, I had tried many different services over the years … from free versions to paid versions, but none really offered anything I can’t do through IFTTT. Once in awhile I will still try a free trial or pay for a few months of a new service claiming better Facebook reach, but so far I haven’t found one that seems to make a difference so I always end up coming back to this.
Here is what I love …
- it’s free!
- all my scheduling is done in one place … my Google calendar
- I can easily drag and drop to rearrange my schedule
- I can schedule posts to recur at whatever time intervals I want and forget about it
- I can schedule for all my social media outlets, including Facebook Page, Pinterest, Twitter, Facebook Groups, Instagram, LinkedIn
Want to give it a try? I will walk you through it step by step. Here is what you will need to set it up …
- a free IFTTT account
- a Google Calendar
- social media accounts
- a free Buffer account for connecting to Facebook Groups and Instagram
Once you have set up your IFTTT account, connect all your services … Google, social media accounts, and Buffer.

Now we will take it service by service. This may seem like a lot of work on the front end but once it is set up it will only take you a few minutes a week to add in brand new content and give the schedule a quick look over.
Using IFTTT to Schedule to Facebook Pages
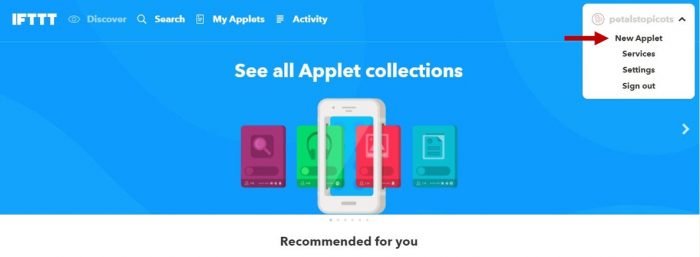
Make sure your Google account and Facebook Page is connected in IFTTT. Click “New Applet“.
Click “this“.

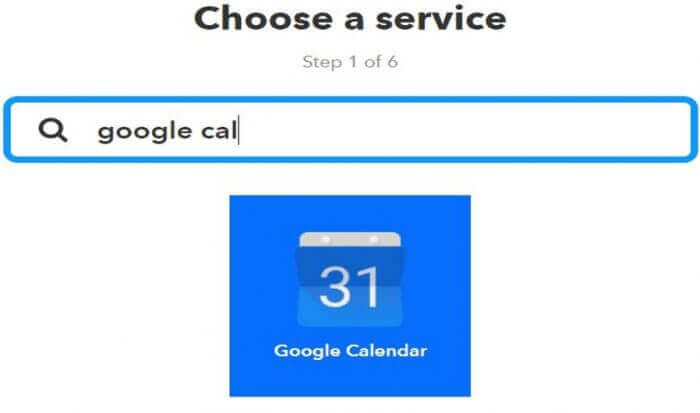
Start typing in and then select “Google Calendar“.
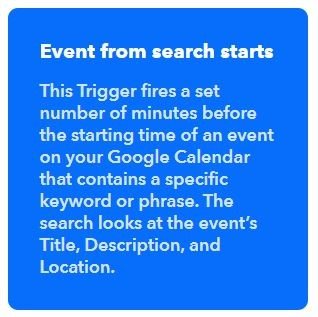
Select “Event from search starts” box.
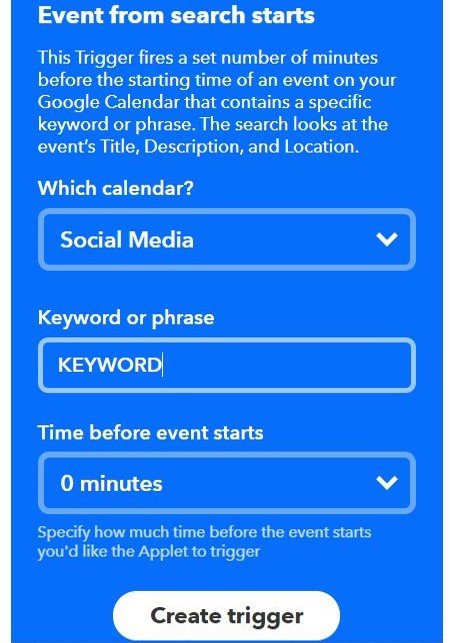
Now set your fields. Select which Google Calendar you want the applet to search. I have a calendar just for social media scheduling. Choose a keyword that will signal the applet to post this to Facebook. Choose something that you would not typically use in your posts, even a nonsensical word, so you don’t accidentally trigger a post when you don’t want to. For purposes of this tutorial I chose KEYWORD. I leave the time setting at 0 so that it posts at the time I set in Google Calendar, give or take a few minutes. Click “Create trigger” when done.
Now click “that“.

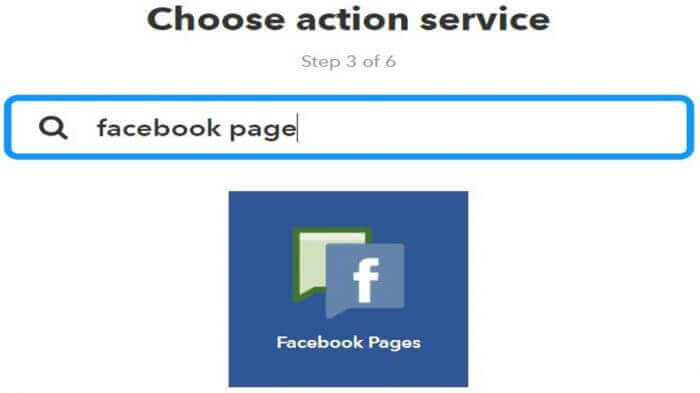
Start typing and select “Facebook Pages“.
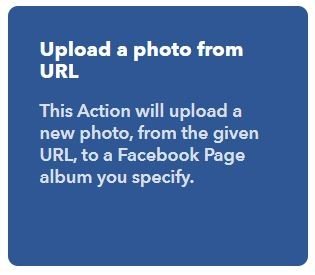
Select the “Upload a photo from URL” box.
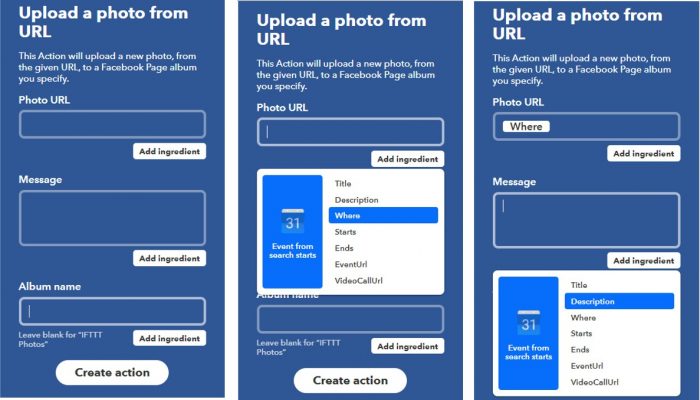
Delete any existing text that may appear in the fields. For the “Photo URL“ field, click “Add ingredient“, and select “Where“. For the “Message” field, click “Add ingredient“, and select “Description“. For the “Message” field, type in the Facebook Album you want the photos to go to. I have mine set to Facebook’s default album “Timeline Photos“. Once filled in, click “Create Action“and then “Finish“. You can choose whether or not to receive notifications each time the applet runs. I usually keep in on at first until I know the applet is working and then turn the notifications off.
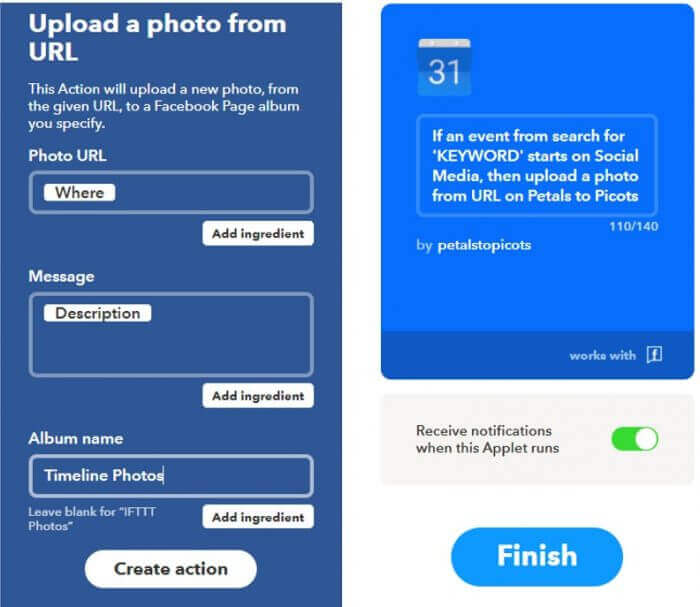
That’s it on the IFTTT end for scheduling to Facebook pages. You have now set up an applet where every time a keyword is found in your Google Calendar, IFTTT will post to your Facebook page. Now all your scheduling will take place in your Google Calendar.
Here is how to set up a post in your Google Calendar. Create a new appointment. Below are the fields that correspond to the areas in IFTTT.
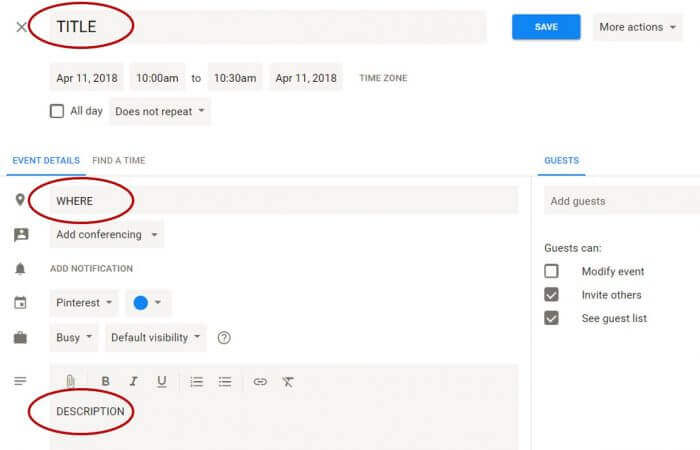
So you would set up a Facebook post as follows …
(a) Add your post title and the keyword you chose and designated in IFTTT, shown here as KEYWORD. Note that the Title line is for your reference and the keyword only and will not show in your Facebook post. (b) Set the date and time you want it to post. (c) If you want the post to repeat at regular intervals, set up a custom repeat schedule. (d) Add the image url to the location (or where) field; this is the image that will be pulled into Facebook. (e) Make sure you are using the correct calendar you have designated for social media scheduling, shown here as Social Media. (f) Add the actual text you want posted on Facebook, along with the post url, to the Description area. Click Save.
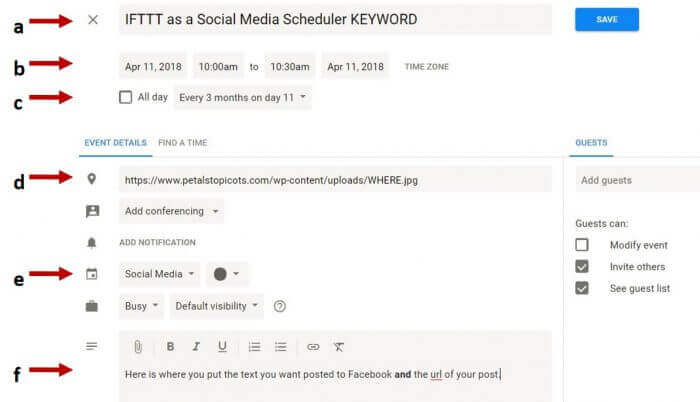
That’s it! Now your post will be shared on Facebook at the time you set and will repeat at whatever schedule you chose, whether it be weekly or every few months for as long as you have it there. You don’t have to do anything more in the future unless you feel like changing up the wording or switching out an image in the future. I also have my Facebook page set up to automatically share Facebook posts to Twitter, so that takes care of most of my Twitter posting as well, although I will show you a way below to individualize a strategy for Twitter if you don’t like the idea of posting duplicate content on both outlets.
Ready to set up another network?
Using IFTTT to Schedule to Pins to Pinterest
Make sure your Pinterest account is connected in IFTTT. Following the same steps as we did above, click “New Applet“.
Click “this“.
Start typing in and then select “Google Calendar“.
Select “Event from search starts” box.
We are going to set up these fields a little different than before. Again, select which Google Calendar you want the applet to search. I have a calendar just for Pinterest but you can use the same calendar as before if you’d like. Choose a different keyword that will signal the applet to post this to Pinterest. Again, choose something won’t accidentally trigger a post. I chose #keyword for here. Again, I leave the time setting at 0. Click “Create trigger“.

Now click “that“.
Start typing and select “Pinterest“.
Select the “Add Pin to board” box.
Delete any existing text that appears in the fields. In the first field, enter the board name you want this applet to pin to. For the “Photo URL“ field, click “Add ingredient“, and select “Where“. For the “Add a description” field, click “Add ingredient“, and select “Description“. For the “Source URL” field, click “Add ingredient“, and select “Title“. Once filled in, click “Create Action“and then “Finish“, again choosing whether or not you want to receive notifications each time the applet runs.
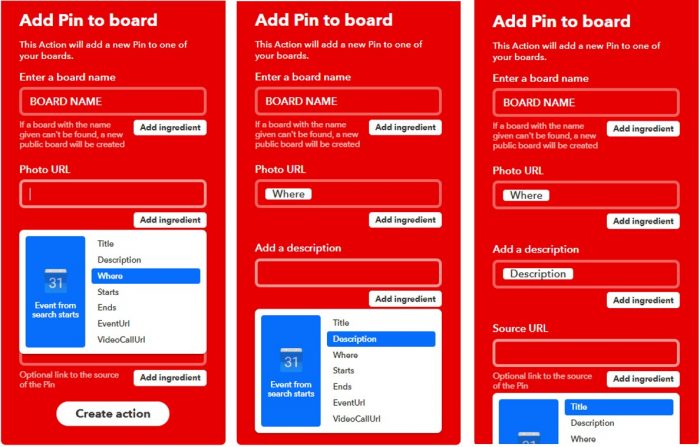
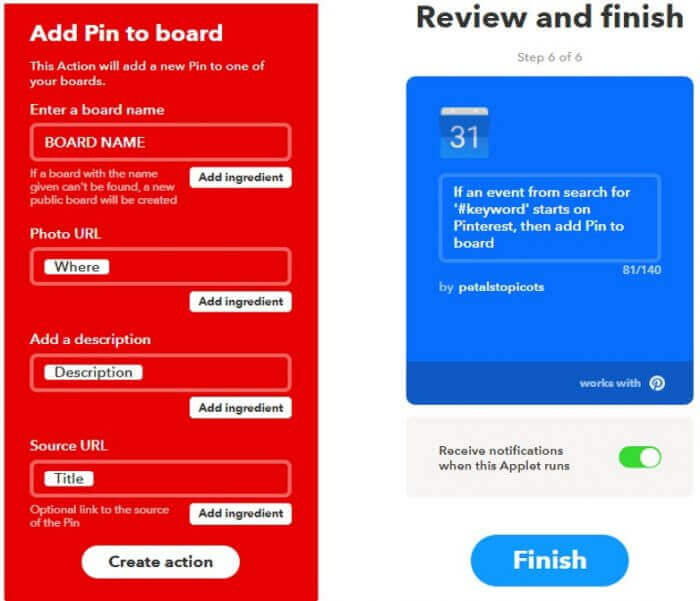
You can repeat this process for as many Pinterest Boards as you like. I personally just stick to a couple of my main boards as to not seem spammy. Now that applet is set and all your Pinterest scheduling to that board can be done on your Google Calendar. Here is how to set up your pin in the calendar; it is slightly different than for what we did for Facebook.
Create a new appointment.
This time you are going to put the URL of the content in the Title field. Set the date and time you want it to post and if you want the post to repeat at regular intervals. Add the image url of the image you want pinned to the location (or where) field. Make sure you are using the correct calendar you have designated in the IFTTT applet. Add the pin description and your keyword here. Click Save.
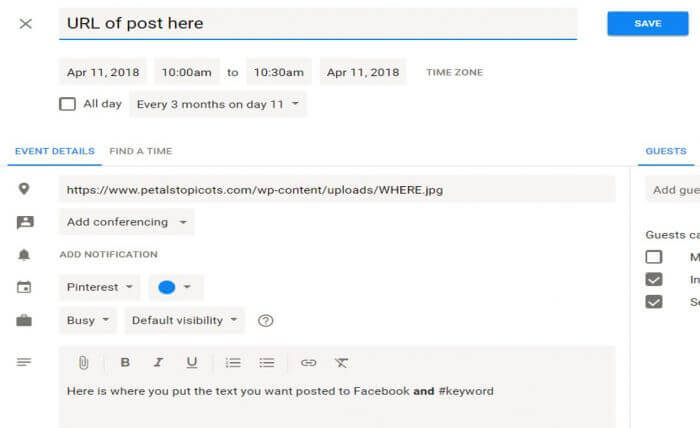
Easy peasy! Set it and forget it.
Using IFTTT to Schedule to Facebook Groups and Instagram Via Buffer
Make sure your Buffer and Gmail accounts are is connected in IFTTT and that your Facebook groups and Instagram, and any other networks you would like, are connected to your Buffer account. You will also need to find your Buffer secret email … when you are signed into your Buffer account, you can find the secret email address through this link here: https://buffer.com/guides/email
Following the same steps as we did above, click “New Applet“.
Click “this“.
Start typing in and then select “Google Calendar“.
Select “Event from search starts” box.
Again, select which Google Calendar you want the applet to search. I use the same calendar and keyword as I do for Facebook so just one post in my Google Calendar will trigger both applets. Leave the time setting at 0. Click “Create trigger” when done.
Now click “that“.
Start typing and select “Gmail“.
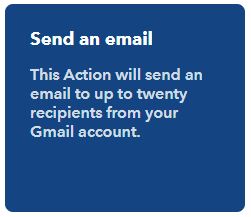
Select the “Send an email” box.
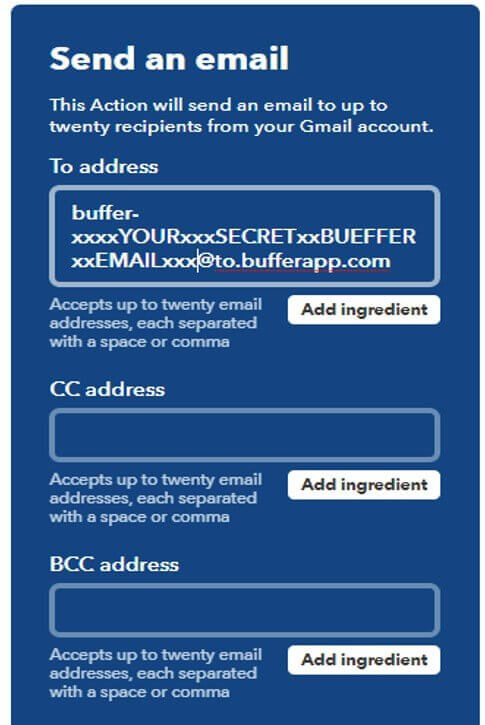
Delete any existing text that may appear in the fields. For the “To address“ field, paste your secret Buffer email (sign into your Buffer account and find it here). Leave the “CC address” and “BCC address” fields blank.
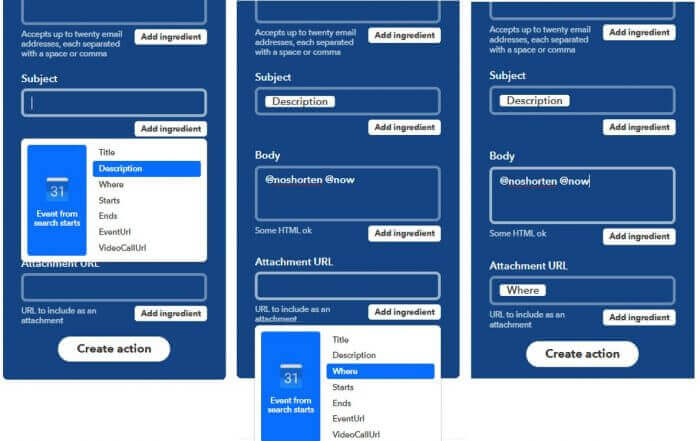
For the “Subject” field, click “Add ingredient“, and select “Description“. In the “Body” field type “@noshorten @now” (← not including the quotation marks). For the “Attachment URL” field, click “Add ingredient“, and select “Where“. Once filled in, click “Create Action“and then “Finish” and choose your notification preference.
Now all your Buffer posts will be prepared in your Google Calendar. You set up an appointment (post) for Buffer the same way I showed above for Facebook. I use the same calendar and keyword so just one post triggers to multiple social media outlets. Note that although you have a time specified in Google Calendar, the post will just be added to your Buffer queue and go out according to how you set up your Buffer schedule.
Using IFTTT to Schedule to Twitter
Following the same steps as we did above, click “New Applet“.
Click “this“.
Start typing in and then select “Google Calendar“.
Select “Event from search starts” box.
Again, select which Google Calendar you want the applet to search. Choose a keyword to trigger the tweet. Leave the time setting at 0. Click “Create trigger” when done.
Now click “that“.
Start typing and select “Twitter“.
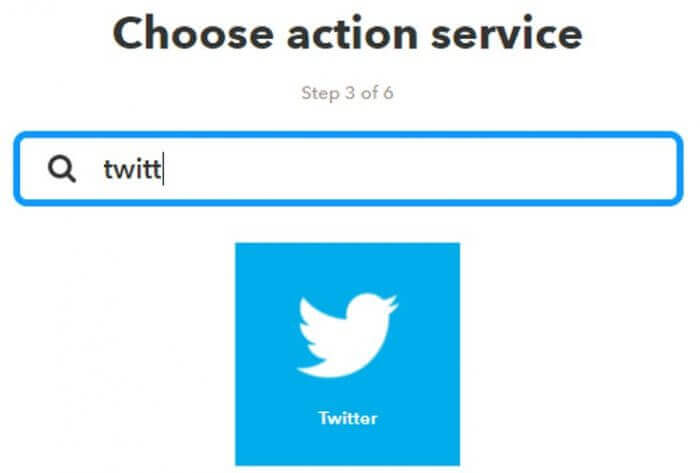
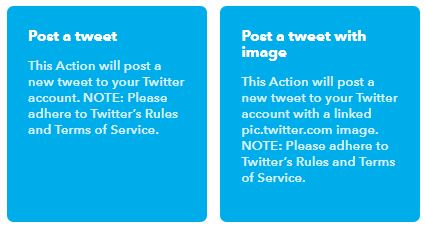
Select the “Post a tweet” box if you are just tweeting text or the “Post a tweet with image” box if you will be including images.
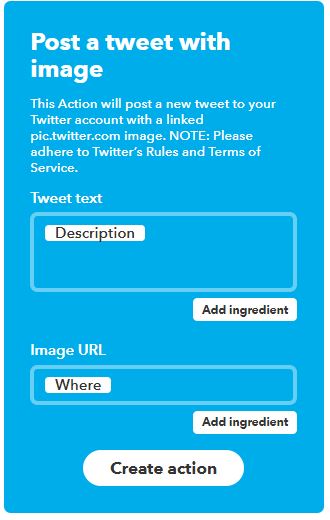
Delete any existing text that may appear in the fields. For the “Tweet text“ field, click “Add ingredient“, and select “Description“. If you chose the option to post with an image you will also have an “Image URL” field; for that field, click “Add ingredient“, and select “Where“. Then click “Create Action“and then “Finish” and choose your notification preference.
You can prepare your tweets in Google Calendar the same way as I showed above for Facebook.
Troubleshooting
I you are having trouble, here are a few things to check …
- that all your networks are correctly connected and haven’t gone offline.
- that you haven’t changed any settings on your other networks … for example, a Pinterest board title, Facebook album name, etc.


Excellent article!
Followed it step by step and so glad to see posts on FB as scheduled in the Google Calendar. One glitch though – the image on FB post is always cropped and is not the complete image. The URL used is pointing to an image in my Google Drive. Is that a known issue? Is there any workaround?
Thanks in advance!
Thank you, Kara, for this extremely helpful IFTTT tutorial! I have been playing around with it this evening and got it to work for scheduling my own blog posts as pins in my google calendar but have not been able to get it to work for pinning content from other sites or for repins of other users’ content from pinterest. Is it possible to do this or does it just work for sites where you know the individual URL for a pinnable image? For, example, if I wanted to schedule a pin of this article onto one of my boards, I would use the URL for this article as the source URL and I would also need an image URL, I think (but I am not sure).
Never would’ve thought I’d find the best IFTTT scheduling post on a knitting website! Awesome job, thanks for posting this! How can we avoid posting the same things over and over, while still keeping everything automatized? I know that we should keep reposting our content occasionally, once a week/month/3 months, and repurposing it too, but how can we automatically post daily 24 tweets and a daily 1-2 FB+IG+Pinterest+LiN posts in a way that doesn’t seem repetitive at all? And is there a way to automate+randomize the strategy that you might suggest here, such as manually putting hundreds of different tweets in Google Calendar and then automating the whole thing, maybe in a randomized way too?
Could you please also comment on how we can deal with scheduling newly created content without interfering with the content we’ve already scheduled to be posted repeatedly, keeping in mind that we should repeatedly post our content at least a few times each? Doing this in a way that won’t make the whole system overflow? Thank you! 🙂
I was able to create an excel spreadsheet with the data columns that Google suggests to use when importing data into google calendar. I then saved the excel sheet as a *.csv file and uploaded it to google calendar with the photo URL in the data area Kara suggests and the Source URL as the title for each entry. I made a little schedule spanning a few months that posts my articles on a monthly basis to my blog post pinterest board.
What ‘post url’ do you mean though? You should include an example.
The post url would be the url of the page you would like people directed to. For example, the post url for this article you would be https://www.petalstopicots.com/how-to-use-ifttt-as-a-social-media-scheduler
Thank you so much for posting this – so helpful! Just a quick question, we’ve set this up to use on various social media sites but we’re finding it difficult to get the formatting of the post content right. For example, on the Google Calendar entry we’ve put links and hashtags on different lines but when this is pulled through to Facebook, all the text is just bunched together. Have you experienced this? and if so have you found a way round it? Thank you so much in advance! 🙂
Signed up for IFTTT for over 4 years but it’s been difficult getting the most out of it, now I think your tips has shined more light on the usage. Thanks for putting this up