Now that we have covered the basics about hooks and yarn in Learn to Crochet — Lesson 1, it’s time to get into some basics stitches. This is the fun part!!!
For a complete list of abbreviations and symbols, as well as other helpful crochet resources, please refer to the Crochet Tutorials and Resources tab above. I will also include the stitch abbreviation and symbol in parentheses after each stitch as it is introduced.
Slip Knot
Most of the time, you will begin by making a slip knot. To do this, make a loop with your yarn and place it over the tail (Fig. 1a). I like to think of it like a pretzel. Place your hook under the tail and pull up through the loop (Fig. 1b), at the same time pull gently on the both ends of the yarn to to create a knot (see Fig. 1c) – but don’t make the knot too tight because you will need to work through the loop on the hook next.
Fig. 1a
Fig. 1b
Fig. 1c
How to Hold the Hook
There are generally two ways to hold a crochet hook: the pencil hold and the knife hold. In the first, you hold the hook as you would a pencil, between your index finger and thumb. The knife hold is similar, except the hook sits back more within your palm, as you would hold a knife. Hold the hook in whichever position feels best for you, or somewhere in between. With the opposite hand, you will control the yarn as you make your stitches (see Fig. 2).
Fig. 2
Chain Stitch
Abbreviation: ch
Stitch Symbol: ![]() or
or ![]()
From here, we can make a chain. This is often called the foundation chain when it is used to begin a project. Wrap the yarn over your hook from back to front (this is called a yarnover, or yo; see Fig. 3a) and pull through the loop on your hook (first chain made Fig. 3b). Continue to yarnover and pull through the loop until the desired number of chains are completed (again, try not to make your stitches too tight, because you will have to work into these later). For this lesson, let’s chain 10. When counting chains, do not count the slip knot or the loop on your hook.
Fig. 3a
Fig. 3b
If we were following a pattern, it would read like this:
Ch 10.
Anatomy of a Chain
The front of a chain looks like a series of “V”s (see Fig. 4a), whereas the back has a series of ridges, or “bumps” (see Fig. 4b). When counting chains, you count each “V”. Where you work your stitches into the chain depends on what your pattern suggests or your individual preference. Some people prefer to work in the top loops only, while others prefer working in the top loops and the ridge and others into both the top and bottom loops. I usually just work my first row into the top loops of the chain. The only time I do not do this is when I am not going to add an edging to my work. In that case, I work into the back ridge only. This method produces an edge that will look the same as the edge you will get in your last row.
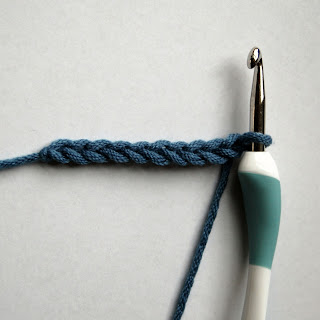
Fig. 4a
Starting a New Row
Before beginning your first row, or foundation row as it is sometimes called, you will need to skip the number of chains that correspond with the height of the stitches to be worked in that row. On subsequent rows, you will need to chain the number of stitches to correspond with the height of the stitches to be used, this is called a turning chain. For example, you would chain one to continue with single crochets, two for half double crochets, three for double crochets, and four for treble crochets (see Fig. 5). Your pattern will direct you which chain to start in or how many chains to make before continuing.

Fig. 5
For the sake of our exercise, we will work single crochets for our first row, therefore, we will begin in the second chain from the hook.
Single Crochet
Abbreviation: sc
Stitch Symbol: ![]()
To work a single crochet, insert your hook into the stitch specified in your pattern, in this case the second chain from the hook (Fig. 6a). Yarn over (Fig. 6b) and draw the yarn through the stitch (Fig. 6c). Yarn over again (Fig. 6d) and pull through both loops (Fig. 6e) — first single crochet made.
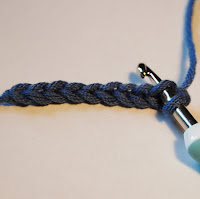
Fig. 6a
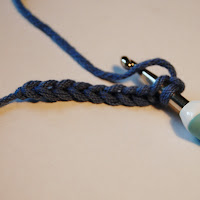
Fig. 6b
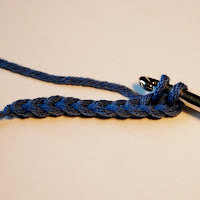
Fig. 6c
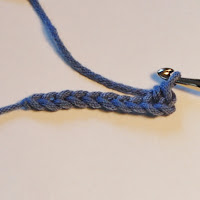
Fig. 6e
Continue working single crochets into the remaining chains. You will end up with a row of 9 single crochets. If you were following a pattern, it would read like this:
Foundation Row: Starting in 2nd ch from hook, work 1 sc in each ch across, turn – 9 sts.
That should give you some insight into getting started. Please feel free to leave me a comment with any questions you may have, and I will do my best to answer them.
Next up is Lesson 3 – Half Doubles, Doubles, and Trebles.


I have been crocheting for fifty years but I always like to look at the basic instructions before I start a new project. These were great. Thanks.
These tips always seemed to help me crochet when I was starting off
Really great tutorial!
What a great tutorial! I think I might give it a try, before I have been too scared to even try it.
I am a beginner, started 5 months ago, learned by watched utube videos, I have given up many times but I was determined to crochet so I am now working on a blanket, it has 120 granny squares, it is called a Harmony Blanket, check out the Attic 24 site to get the pattern which includes pictures with instructions, you will love it. I just love all the pretty yarn colors. My blanket colors were all included in the pattern, I just had to order the wool. Jada in Stitches has a good tutorial for the granny square, a good choice for a beginner, the video is very slow and you get to see all the steps, good luck!
Featuring on Thursday at Bacon Time 🙂
I hold my crochet hook like a knife. I always thought it was wrong – but it was easier for me. Thanks you so much for linking up.
Rachel
adventuresofadiymom.blogspot.com
Oh, I so needed this. I haven’t done this in years, lots and lots of them. I have been wanting to give this a try again, though. Your pics and writing are so clear, even I, the spatially challenged, can get it. Thanks. I’m looking forward to keeping up with your blog. New follower!
I started crocheting a couple years ago. This would have been very helpful. So many places assume you know this stuff.:) Thanks so much!
Thank you, Shiloh!
Thanks for the lesson, enjoyed it very much!
Thank you, Anita!