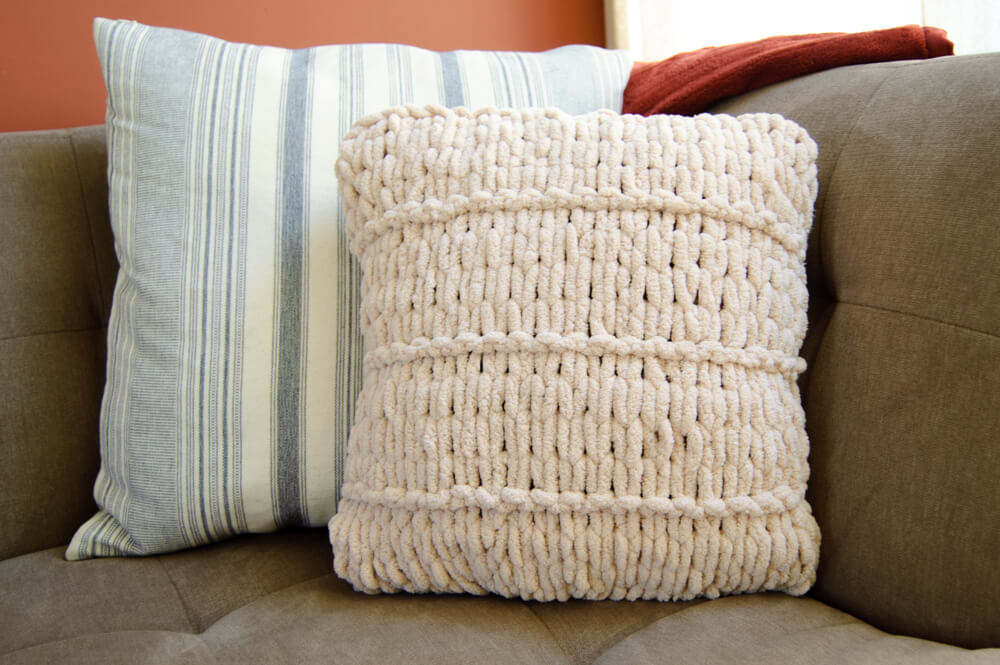
This soft and cushy knit pillow is so easy to make! It is finger knit with loop yarn and requires no prior knitting experience to make!
The pillow is uses only 2 skeins of loop yarn to make and is finger knit in panels to create a pillow cover. It’s a quick and inexpensive way to give an old pillow a much needed makeover, or you can purchase a new pillow form through the supply list below,
I absolutely love how this pillow came out … it has a classic knit look with purl accent rows for interest. And it has such a transitional cozy vibe that I can see working in all different decors, from beachy to farmhouse to modern!
If you are new to finger knitting with loop yarn, no worries … Lion Brand has a video that I included below to guide you through the basics. Then keep scrolling for my free knit pillow pattern below.

How to finger knit with Loop Yarn
If you are new to using loop yarn, it’s worked by using your fingers to pull one loop through another to essentially knit or purl a stitch. Lion Brand put together this helpful video on so you can see exactly how it works.
Loop Yarn Knit Pillow Pattern
Here is what you will need:
- 2 skeins (3.5 oz/100 g) Lion Brand Off The Hook Loop Yarn, shown here in Beach Sand – 098
- 14 x 14 in. pillow form
- scissors
- needle and thread for finishing
Notes:
- Work with right side facing you throughout; do not turn after each row.
- “Knit” stitches are worked by pulling working loops through stitches from back to front of work.
- “Purl” stitches are worked by pulling working loops through stitches from front to back of work.
Finished pillow measures approximately 14 in. x 14 in.
Add this pattern to your Ravelry library.
Finger knitting the Pillow Panels (make 2)
Row 1: Count out 22 loops for beginning foundation. Place a stitch marker after 22nd st.
Row 2: Pull the next loop from back to front through the previous loop (the 22nd loop counted in your foundation) to knit the stitch. Continue knitting the stitches across — 22 sts.
Rows 3 and 4: Working back across stitches just made, knit across — 22 sts.
Row 5: Working back across stitches just made, pull up the next loop from front to back to purl the stitch. Continue purling the stitches across — 22 sts.
Rows 6 through 8: Working back across stitches just made, knit across — 22 sts.
Row 9: Working back across stitches just made, purl across — 22 sts.
Rows 10 through 13: Repeat Rows 6 through 9.
Rows 14 though 16: Working back across stitches just made, knit across — 22 sts.
Finger Knit Bind Off: Bind off using the loops (stitches) from your last row. To bind off, pull the second stitch through first one, the next stitch through the current one, and so on until all loops are bound off. Cut remaining yarn to form a tail and pull through last loop.
Weave in ends.
Finishing
To finish the pillow, place two knit pieces together with wrong sides facing. Using a needle and thread sew pieces together along three sides. Insert pillow form into open side and sew closed.
Other projects you may Enjoy:


Kara, que preciosidad! un cojín decorativo por su belleza, además de funcional
Saludos
Eli R.
This is a great quick project. Picked up and put down this yarn many times in the craft stores and finally picked it up and bought it. Great project for children who you want to get interested in knitting or crocheting. The process allows the kids to see real progress just after a few rows.