
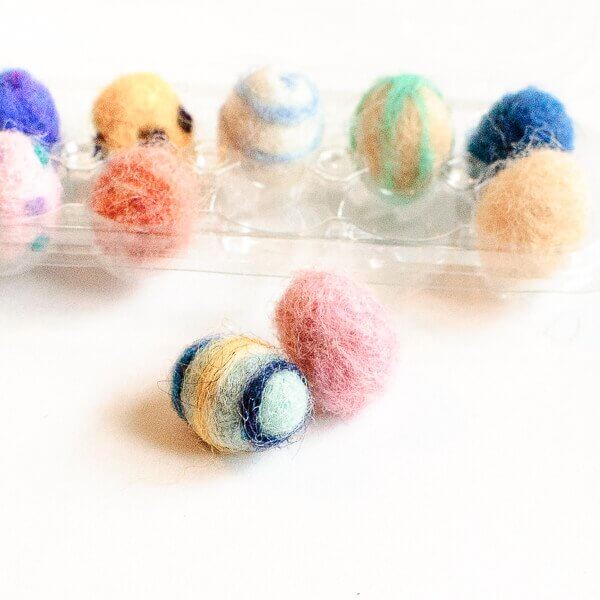
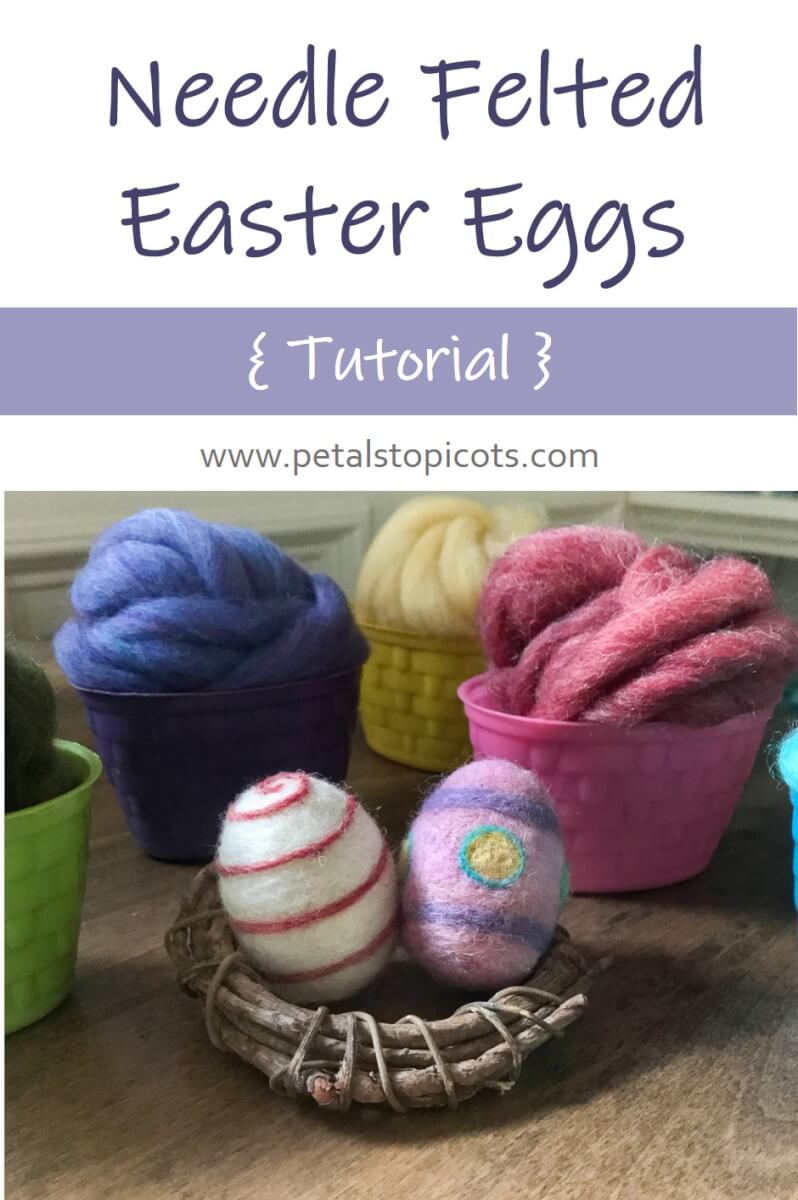
Coloring eggs has never been so fun! Use bits of colorful wool to make one-of-a-kind needle felted Easter eggs that can be used in your Spring decor for years to come. If you have needle felted before, you probably have lots of leftover wool bits to make a colorful display. And if not, this gives you the perfect opportunity to go buy some pretty wool colors!

I even made some teeny needle felted eggs to fit in a plastic candy carton my kids had left over from their treats last year.

Needle Felted Easter Eggs Tutorial
Here’s what you will need:
- 36- or 38-gauge felting needle(s)
- foam pad
- Core wool batting
- Wool batting or roving in pretty Easter colors
I’ve tried to include enough detail and photos in this tutorial with the hope that even if you are brand new to needle felting, you will be able to easily needle felt the eggs right along with me. If you would like more detail on needle felting and needle felting techniques, or just need a refresher, check out Needle Felting 101 here.
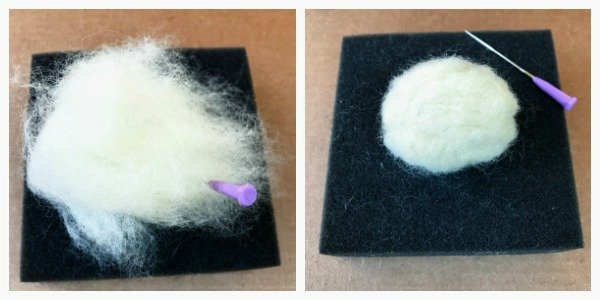
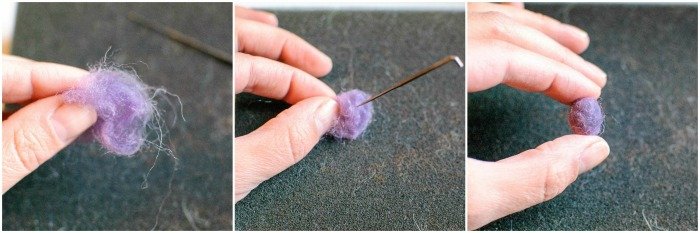
Step 1
Larger Eggs: For the larger eggs, I started with some core wool batting to make my basic egg shape. Roll the wool tightly into a ball and use a felting needle to poke the wool into a firm egg shape … but take care not too needle it too firm because we still want to be able to attach more layers of wool as we decorate.
Small Eggs: For the small eggs, I didn’t use the core wool but instead started right off with the colored roving. Pull off a small amount of wool roving and roll it in your palms a little bit to form a ball. Then needle the wool into an egg shape, again making sure not to felt it too firm.
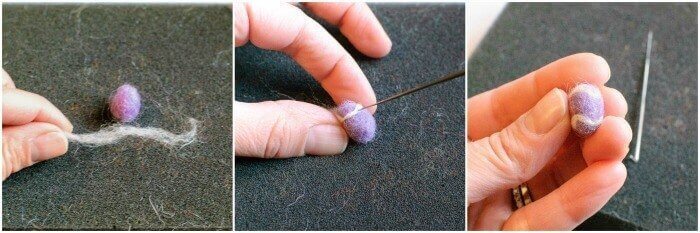
Step 2
For both size eggs, once you have your egg shape made it’s time to decorate!
Grab small wisps of colored roving and poke the wool with your needle to get your desired effect. Go crazy … think stripes, or waves, or polka dots, or letters!
So fun, right?!! Share your needle felted eggs with the
Petals to Picots Instagram community. Tag me @petalstopicots.
you may Also enjoy …
- How to Make Needle Felted Acorns
- Needle Felted Owl Tutorial
- Pumpkin Needle Felting Project
- Needle Felted Hedgehog Tutorial
Find more free Easter projects here.
So cute!
Thanks, ChiWei!
How cute!!
Thanks, Amy 🙂
oh, these are adorable! I need to try try needle felting already!
It’s so much fun! You will love it, Nancy!
These are so cute! I do have a question… Is it easier to felt smaller projects with just the one needle? I only bought the tool that has several needles in it, but I’m wondering if I need to get a couple single needles too.
I find it easier to do small items with one needle. I tend to jab myself if I use my tools that have multiple needles … Ouch!!
These would make neat decor additions to my entryway!
So glad you like them!
They look so cute – very clever.
Thank you, Lorna 🙂