I had such a blast last week seeing everyone’s projects posted in the Ravelry group and on my Facebook page. And I am so blown away by how our little CAL is spanning the globe. We have participants from all over the world, included the United States, United Kingdom, Belgium, the Netherlands, Denmark, Australia, Mexico, India, Canada, and New Zealand! I think that is so awesome!!
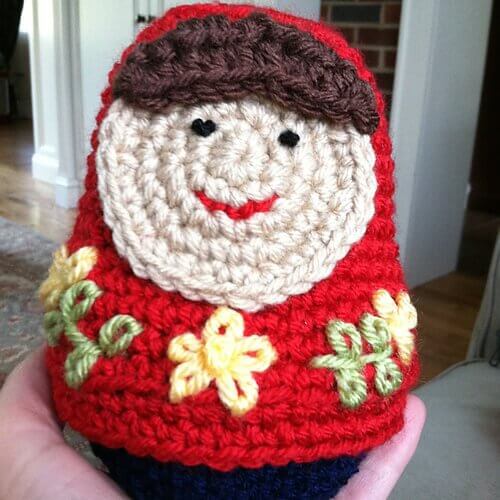
I finished my first doll this week and so am happy with how she came out. I still need to add her little felt cheeks 🙂

So, are you ready for the next Matryoshka pattern? Here we go …
Medium Doll
Finished doll measurements: bottom = 1½” (3.8 cm) tall; top = 2¼” (5.5 cm) tall.
Gauge = 10 sc and 10 rows = 2″ (5 cm) in sc stitch.
Bottom
With color I, make a ring.
Rnd 1: Sc 6 times into ring—6 sc, pm in last stitch of rnd, do not turn. Cont to move marker up each rnd.
Rnd 2: 2 sc in each of 6 sc—12 sc, do not turn.
Rnd 3: *2 Sc in next st, sc in next st; rep from * around—18 sc, do not turn.
Rnd 4: *2 Sc in next st, sc in each of next 2 sts; rep from * around—24 sc, do not turn.
Rnd 5: Working in back loops only, sc in each st around, do not turn.
Rnd 6: *2 Sc in next st, sc in each of next 3 sts; rep from * around—30 sc, do not turn.
Rnd 7: Sc in each st around, do not turn.
Rnd 8: *2 Sc in next st, sc in each of next 4 sts; repeat around—36 sc, do not turn.
Rnds 9–11: Sc in each st around, do not turn.
Rnd 12: *Sc2tog, sc in each of next 4 sts; rep from * around—30 sc, do not turn.
Rnd 13: Working in back loops only, sc in each st around, do not turn.
Rnd 14: Sc in each st around, sl st in next stitch, fasten off, leaving 6″ (15 cm) tail. Weave in yarn tail.
Top
With color H, make a ring.
Rnds 1–3: Rep Rnds 1–3 of bottom.
Rnd 4: Working in back loops only, sc in each st around, do not turn.
Rnd 5: Rep Rnd 4 of bottom.
Rnd 6: Rep Rnd 6 of bottom.
Rnds 7–12: Sc in each st around, do not turn.
Rnd 13: Rep Rnd 8 of bottom.
Rnds 14 and 15: Sc in each st around, do not turn.
Rnd 16: Working in back loops only, sc in each st around, do not turn.
Rnd 17: Sc in each st around, sl st in next st, fasten off, leaving a 6″ (15 cm) tail. Weave in yarn tail.
Face
With color C, make a ring.
Rnds 1–4: Rep Rnds 1–4 of bottom, sl st in next st, fasten off, leaving a 16″ (40.5 cm) tail, which will be used to sew face piece to top.
Hair
With color D, ch 9.
Row 1: 2 Sc 2nd ch from the hook, hdc in each of next 2 ch, sc2tog, hdc in each of next 2 ch, 2 sc in last ch—9 sts, ch 1, turn.
Row 2: 2 Sc in first st, sc in next st, hdc in each of next 2 sts, sl st in next st, hdc in each of next 2 sts, sc in next st, 2 sc in last st—11 sts,
turn. Sl st in next st, fasten off, leaving 16″ (40.5 cm) tail, which will be used to sew hair to face piece.
Finishing
Arrange hair piece placing foundation edge on face edge, and sew in place with yarn tail.
With black thread and 2 medium black beads, sew to face for eyes. Sew a smile with red thread. Cut two 3/8″ (1 cm) circles (see diagram) of pink felt for cheeks. Sew to face with pink thread.
With color A, sew straight stitches to embroider around face edge, and make a little bow in the center under the face.
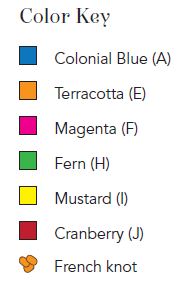
Arrange embellished face with hair edge along Rnd 4 of top and sew in place. Embroider flowers below face and along edge following diagram for Medium Doll using daisy stitch for flowers and French knot for centers.

Feel free to share your progress or your finished dolls in our Ravelry group or my Facebook page.
Stitchy Nesting Dolls were designed by Amy Gaines and appear in Bara, B. (2013). Crochet at Home: 25 Clever Projects for Colorful Living. Interweave Press. Crochet along approved and pattern reprinted with permission from Interweave Press. Photography by Joe Hancock.
Crochet at Home can be purchased from Amazon, Barnes & Noble, and Interweave.


My face piece seems to be a lot smaller comparatively to the images? I ended up with 30 stitches in my last round of the face.
So adorable, I love how it came out! Great Job
It is very nice to see all the dolls
I’m a week behind – just started yesterday – now I have some incentive to get the first one finished.
I do have the bottom and top pieces done for the first doll – and have a question – the top piece doesn’t easily fit over the bottom – should I try remaking with a little bit bigger hook?
Perhaps, but if you give the top a little tug here and there will it fit?
I tried tugging at it and it started to look rather strange, so I ripped back the last two rows and changed to a 3.75 hook for the last two rows of the top. It worked great!
I actually changed the 2nd last row of the top from back-loops only to front-loops only, and now they fit together perfectly. Didn’t make sense to me that both the top and bottom angled in.
i was thinking the same.. just started my first doll and I did the 2nd last row of the top part in FRONT loops instead backloops…
YAY just got the pattern, thank you!! 🙂
Thank you so much for the patterns. I have been crocheting a long time and am having so much fun with this. Can’t wait for the next project to do with all of my new crocheting buddies!
The second one!!!! Yay!!! Can’t wait to start, thank you for this lovely CAL!!!!