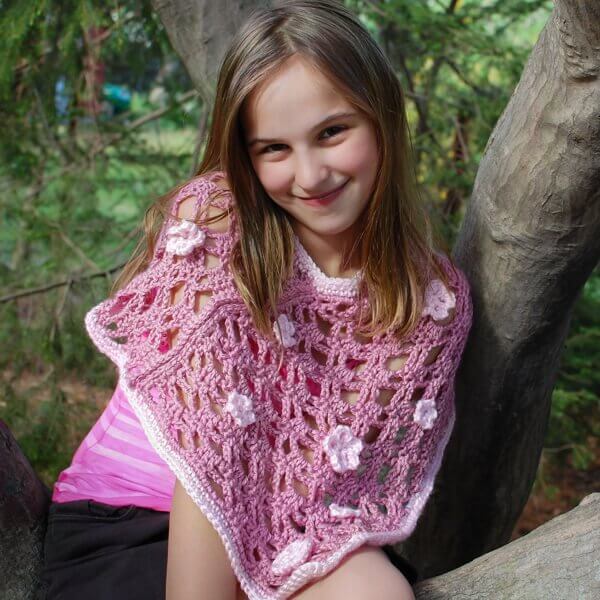
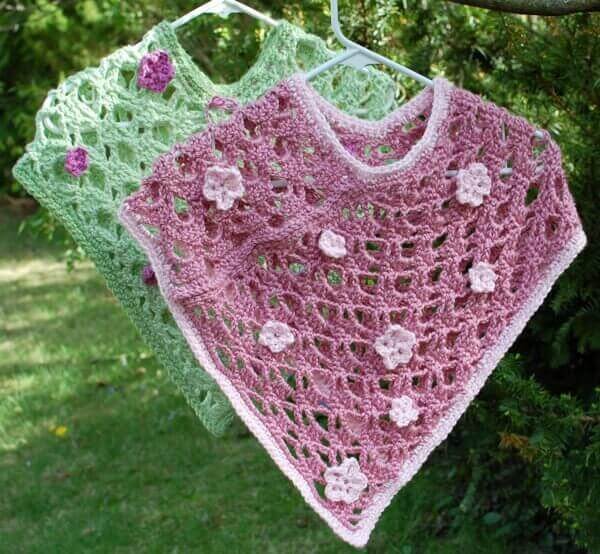
This lightweight Spring Flowers Poncho crochet pattern is perfect for those milder days! The easy-to-follow pattern includes instructions to make 3 child sizes of the poncho and 2 flowers sizes.

Spring Flowers Poncho Crochet Pattern

Here is what you will need:
- 2 skeins worsted-weight yarn (approx. 200 yds per skein)
- 1 small skein worsted weight in a coordinating color (approx. 100 yds)
- I hook, H hook
- yarn needle, stitch markers, scissors
Resources and tutorials you may find helpful in following this crochet pattern: Crochet Abbreviations, U.S. to U.K. Crochet Conversion Chart, How to Make a Magic Ring {photo & video tutorial}.
Add this pattern to your Ravelry library.
Available as a convenient, ad-free pdf download here.
Child Sizes: Small (2-4) = approx. 18 in. × 22 in.; Medium (6-8) = approx. 20 in. × 26 in.; Large (10-12) = approx. 22 in. × 30 in. (dimensions = length × width).
Written for size Small (with changes for Medium, Large in parentheses).
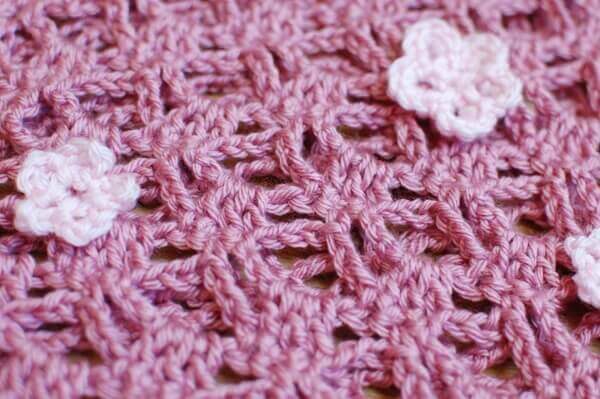
Gauge = 12 scs and 15 rows = approx. 4 in. Pattern repeat (Rows 3 through 6) = approx. 2 in. high
Poncho Panel (make 2)
Note: Chain stitches within the row are included in the stitch counts unless otherwise noted.
With I hook and main color, ch 34 (42, 50).
Row 1: Work 1 sc in 2nd ch from hook and in each ch across, turn — 33 (41, 49) sts.
Row 2: Ch 1 (does not count as st), 1 sc in 1st st, *ch 3, sk next 2 sts, 1 dc in each of the next 3 sts, ch 3, sk next 2 sts, 1 sc in next, rep from * across, turn — 41 (51, 61) sts.
Row 3: Ch 5 (counts as dc plus ch 2), *1 sc in each of the next 3 dcs, ch 5, sk next 2 ch-3sp, rep from * 2 (3, 4) more times, 1 sc in each of the next 3 dcs, ch 2, sk next ch-3sp, 1 dc in last sc, turn — 33 (41, 49) sts.
Row 4: Ch 3 (counts as dc), 1 dc in 1st ch-2sp, *ch 3, sk next sc, 1 sc in next, sk next sc, ch 3, 3 dc in ch-5sp, rep from * 2 (3, 4) more times, ch 3, sk next sc, 1 sc in next, sk next sc, ch 3, 1 dc in ch-5sp, 1 dc in 3rd ch of turning ch, turn — 41 (51, 61) sts.
Row 5: Ch 1 (does not count as st), 1 sc in each of the 1st 2 dcs, ch 5, sk next 2 ch-3sp, *1 sc in each of the next 3 dc, ch 5, sk next 2 ch-3sp, rep from * 2 (3, 4) more times, 1 sc in last dc, 1 sc in top of turning ch, turn — 33 (41, 49) sts.
Row 6: Ch 1 (does not count as st), 1 sc in 1st sc, *ch 3, sk next sc, 3 dc in ch-5sp, ch 3, sk next sc, 1 sc in next, sk next sc, rep from * 3 (4, 5) more times, turn — 41 (51, 61) sts.
Rows 7 through 38 (46, 54): Repeat Rows 3 through 6 for pattern.
Row 39 (47, 55): Repeat Row 3.
Row 40 (48, 56): Ch 1 (does not count as st), 1 sc in 1st dc, 2 sc in ch-2sp, *1 sc in each of the next 3 dcs, 5 sc in ch-5sp, rep from * 2 (3, 4) more times, 1 sc in each of the next 3 dcs, 2 sc in ch-5sp, 1 sc in ch 3 of turning ch, turn — 33 (41, 49) sts.
Row 40 (48, 56): Ch 1 (does not count as st), 1 sc in each st across, do not turn, do not fasten off — 33 (41, 49) sts.
Rectangle Edging: Work sc across side of piece, 1 sc in each st of opposite side of beginning ch, sc back across other side of piece, join, fasten off and weave in ends.
After working up your first panel, take a moment to check the size. Your approximate measurements should be as illustrated below.

Joining Pieces
Lay 1st rectangle down, wrong side up (Image a). Lay next rectangle down on top, right side up, forming a V, making sure edges of the V line up (Image b). Fold the top of the bottom rectangle forward and secure to side edge of top rectangle with stitch markers or safety pins to keep in place (Image c). Fold top of top rectangle back and secure to side edge of the bottom rectangle with stitch markers or safety pins to keep in place (Image d). Check neckline to make sure there is enough of an opening and adjust pins if necessary. Carefully turn piece inside out and sew pieces together. Turn back so right sides are out.

Poncho Edging
Neckline: Join coordinating color to neckline, ch 1, work 1 sc in same st as join and in each st around, join, do not turn. Ch 1, work 1 sc in same st as join and in each st around, join. Fasten off and weave in ends.
Bottom: Join coordinating color to bottom edge, ch 1, work 1 sc in same st as join and in each st around and 3 scs in each center point, join, do not turn. Ch 1, work 1 sc in same st as join and in each st around and 3 scs in each center point, join. Fasten off and weave in ends.
Your finished poncho should be these approximate dimensions. Please note that measurements will differ depending on the tension of your stitches and the brand of yarn used. The stitch pattern used here also allows for some stretch.

Flowers
Small (make 3 [4, 4] or as many as desired)
With H hook and coordinating color, make a magic ring or ch 4 and join in furthest ch from hook to form a ring.
Row 1: *Ch 4, Sl st in ring, rep from * 4 more times — 5 ch-4 petals.
Fasten off, leaving a long enough tail to sew flower to poncho.
Large (make 4 [4, 5] or as many as desired)
With H hook and coordinating color, make a magic ring or ch 4 and join in furthest ch from hook to form a ring.
Row 1: *Ch 4, Sl st in ring, rep from * 4 more times, do not turn — 5 ch-4 loops.
Row 2: *5 sc in ch-4 loop, Sl st in Sl st from Row 1, rep from * 4 more times — 5 ch-4 petals.
Fasten off, leaving a long enough tail to sew flower to poncho.
Finishing
Using a tapestry needle, sew flowers to poncho as shown here or in any arrangement you desire. Weave in ends.


Leave a Reply