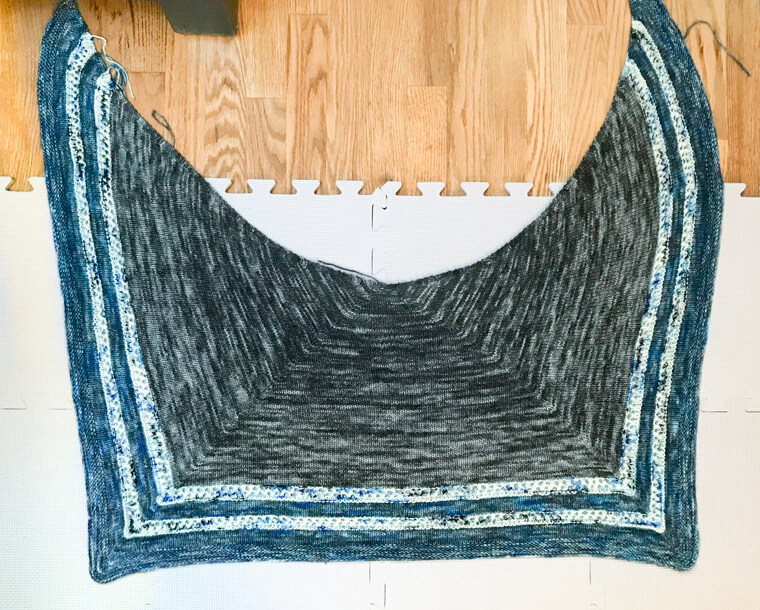
The Stormy Seas Knit Shawl Pattern is an easy knit with a unique design! It’s worked from the top center outwards to create a three-quarter square shape. I love how versatile this shape is to wear … I’ve included more photos than usual just to show you!
The name of the pattern is inspired by the amazing trio of Zen Yarn Garden Serenity 20 yarn I used. The colors conjure images of dark and stormy seas with tempestuous winds, churning deep waters, and foaming waves crashing.
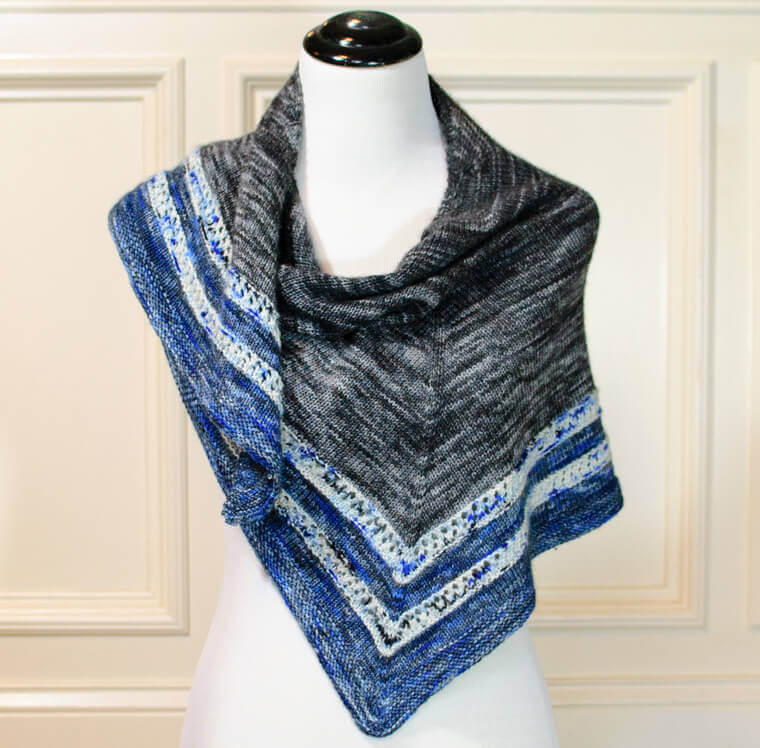
Zen Yarn Garden Serenity 20 yarn is a lovely hand-dyed fingering weight yarn comprised of 70% superwash merino, 20% cashmere, and 10% nylon. The bundles are put together by grouping yarn dyed within a similar color family so you can easily coordinate your project.
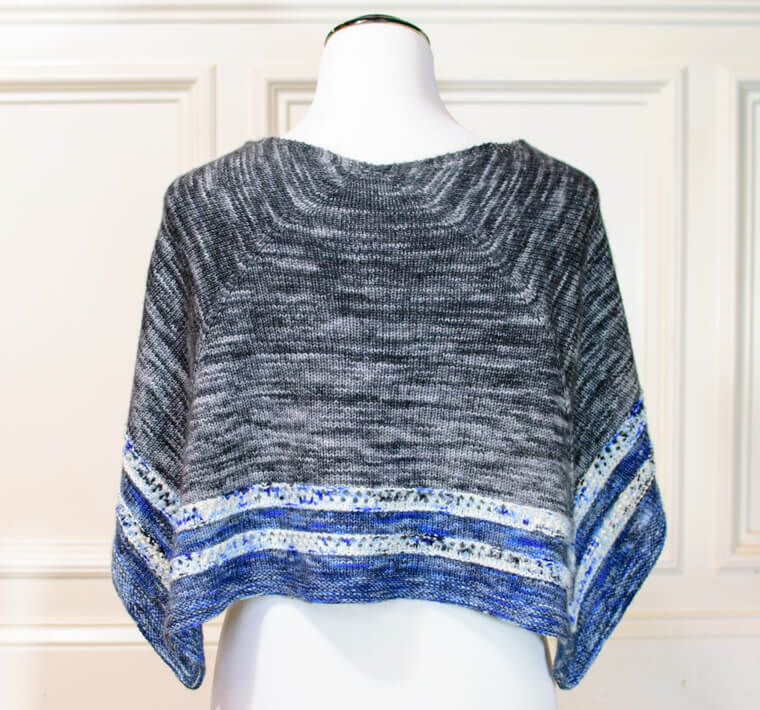
Stormy Seas Knit Shawl Pattern

Here is what you will need:
- Three colors fingering weight yarn, approx. 400 yd each (shown here in Zen Yarn Garden Serenity 20 Jazzy Bundle which includes colors Obsidian, Jazzy Splatter, and Jazzy OOAK)
- US 4-3.5 mm 40-in. circular knitting needles
- stitch markers
- scissors and yarn needle for finishing
Add this pattern to your Ravelry library.
Notes:
- The finished size as written is 33 in. wide x 33 in. long x 15.5 in. from neck to bottom.
- 20 stitches and 46 rows = 4 inches after blocking
Abbreviations Used:
- M1R (make 1 stitch right) – pick up the bar between the last stitch and the next stitch by inserting left needle from back to front under bar, knit through front loop.
- M1L (make 1 stitch left) – pick up the bar between the last stitch and the next stitch by inserting left needle from front to back, knit through back loop.
- Click here to reference other basic Knitting Abbreviations.
Shawl Setup
With CA, cast on 3 sts.
K 6 rows; do not turn after last row.
Pick up and knit 3 along left edge of piece, pick up and knit 3 sts along cast on edge, turn.
K across — 9 sts.
Shawl Body – Section 1
Row 1 (RS): K3, kfb 3 times, K3 — 12 sts.
Row 2 (WS): K3, pm, purl to last 3 sts, pm, K3.
Row 3: K3, pm, M1L, K2, MIR, K2, M1L, K2, M1R, pm, K3 — 16 sts.
Row 4: Repeat Row 2.
Row 5: K3, pm, M1L, k2, M1R, pm, K2, pm, M1L, k2, M1R, pm, K2, pm, M1L, k2, M1R, pm, K3 — 22 sts.
Row 6: Repeat Row 2.
Row 7: K3, pm, M1L, k to m, M1R, pm, K2, pm, M1L, k to m, M1R, pm, K2, pm, M1L, k to m, M1R, pm, K3 — 28 sts.
Row 8: Repeat Row 2.
Rows 9 through 107: Repeat Rows 7-8, ending with 334 sts.
Drop CA.
Shawl Body – Section 2
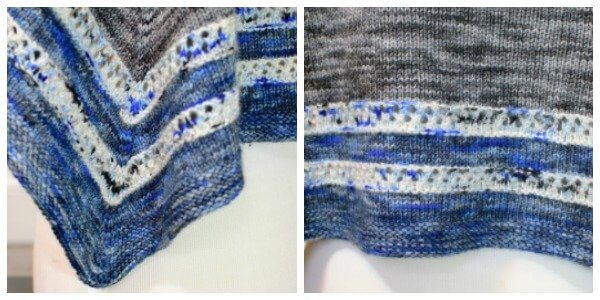
Join CB.
Row 1: K3, pm, M1L, k to m, M1R, pm, K2, pm, M1L, k to m, M1R, pm, K2, pm, M1L, k to m, M1R, pm, K3 — 340 sts.
Row 2: K across.
Row 3: K3, pm, M1L, (yo, K2tog) across to m, M1R, pm, K2, pm, M1L, (yo, K2tog) across to m, M1R, pm, K2, pm, M1L, (yo, K2tog) across to m, M1R, pm, K3 — 346 sts.
Row 4: K3, P to last 3 sts, K3
Row 5: K3, pm, M1L, K1, (yo, K2tog) across to 1 st before m, K1, M1R, pm, K2, pm, M1L, K1, (yo, K2tog) across to 1 st before m, K1, M1R, pm, K2, pm, M1L, K1, (yo, K2tog) across to 1 st before m, K1, M1R, pm, K3 — 352 sts.
Row 6: K3, P to last 3 sts, K3
Row 7: K3, pm, M1L, k to m, M1R, pm, K2, pm, M1L, k to m, M1R, pm, K2, pm, M1L, k to m, M1R, pm, K3 — 358 sts.
Row 8: K across.
Drop CB and join CC.
Row 9: K3, pm, M1L, k2, M1R, pm, K2, pm, M1L, k2, M1R, pm, K2, pm, M1L, k2, M1R, pm, K3 — 364 sts.
Row 10: K3, pm, purl to last 3 sts, pm, K3.
Rows 11 through 16: Repeat Rows 9 and 10, ending with 382 sts.
Repeat Section 2 once more, ending with 430 sts.
Garter Stitch Edging
Row 1: K3, pm, M1L, k to m, M1R, pm, K2, pm, M1L, k to m, M1R, pm, K2, pm, M1L, k to m, M1R, pm, K3 — 436 sts.
Row 2: K across.
Rows 3 through 12: Repeat Rows 1 and 2, ending with 466 sts.
Knit bind off.
Fasten off, weave in ends.
Block shawl to shape (see How to Block Your Knit and Crochet Items).


She’s I about Section 2 – Row 9: After M1L, should it be Knit to marker? Otherwise the stitch count doesn’t make sense
I was wondering about the ending of section 1. It says work rows 9-107 ending with 334 st. If I work row 107, I am now at the beginning of a WS row. Should I P back across and attach CB on the beginning of the RS? So really work rows 9-108?
What do you mean by picking up stitches on the left hand side without turning the project? In trying to look up what you mean I can only find tutorials that show picking up in finished projects not one that has litterally just began.
Hi Alexis 🙂 Let me try to clarify … after you finish knitting the stitches across, with your stitches still on the right hand needle you are going to pick up and knit the stitches along the left edge. Then along the cast on edge. It’s like you are stitching in an arc shape then.
This is called a garter tab. There are many tutorials on how to do this in YouTube.