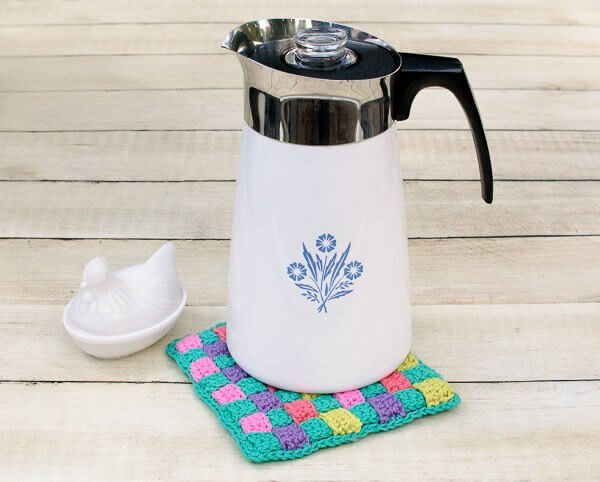
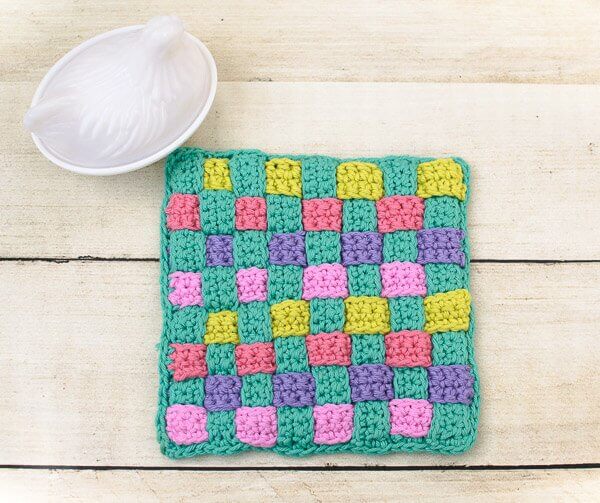
This Woven Potholder Crochet Pattern can be worked up in so many different color themes … you can try a two color look or use a bunch of different colors like I did. For this potholder here (or do you call it a hot pad by you?), I used 5 colors of Debbie Bliss Cotton DK and a G hook, but it would also work up well in a worsted weight cotton with an H hook. The important thing is that your yarn is cotton because acrylic could melt if you put something hot on it.

Working on this woven potholder crochet pattern reminded me of the loom potholders I did as a kid. Remember them?! But I must say I enjoyed this crochet version much more!!
And I love how the bright colors go with the vintage-y things in my kitchen!
Woven Potholder Crochet Pattern

Here is what you will need:
- Debbie Bliss Cotton DK in 5 different colors (84m each), shown here in
- CA = Jade, #13078
- CB = Candy, #13073
- CC = Mallow, #13074
- CD = Coral, #13064
- CE = Citrus, #13079
- US G-6 / 4.0 mm crochet hook
- yarn needle and scissors
- stitch markers or safety pins (optional)
This free pattern is written in U.S. crochet terms and abbreviations. Stitch counts are provided at the end of each round to help you keep on track.
Resources and tutorials you may find helpful in following this pattern: Crochet Abbreviations, U.S. to U.K. Crochet Conversion Chart.
Add this pattern to your Ravelry library.
Finished potholder measures approximately 7 in. × 7 in.
Gauge: 15 sc and 18 rows = 4 in.
Colored Strips
Make 8 of CA.
Make 2 each of CB, CC, CD, and CE.
Ch 25.
Row 1: Work 1 sc in 2nd ch from hook and each ch across, turn — 24 sts.
Row 2: Ch 1 (does not count as st here and throughout), work 1 sc in each st across, turn — 24 sts.
Row 3: Repeat Row 2.
Fasten off, weave in ends.
Solid Backing
With CA, ch 25.
Row 1: Work 1 sc in 2nd ch from hook and each ch across, turn — 24 sts.
Row 2: Ch 1 (does not count as st here and throughout), work 1 sc in each st across, turn — 24 sts.
Rows 3 through 28: Repeat Row 2, turn but do not fasten off after Row 28.
Arranging the Strips
Place CA strips vertically on the solid backing so that they lay side by side with each short edge lining up with last row of backing.
With working yarn of backing, ch 1, attach strips to backing by working 3 sc across the edge of each strip and through the corresponding 3 sts of the backing, continue with each strip to corner, working 3 sc in corner st.
Weave remaining colored strips horizontally through CA strips, beginning with CB. Weave strip under first vertical strip, over next vertical strip, under next, etc. With a CC strip, weaver over first vertical strip, under next vertical strip, over next, etc. Continue with CD and CE strips and then with all colors again strips taking care to alternate each strip. Secure the edges of each strip to the backing with safety pins or locking stitch markers.
With working yarn, continue attaching colored strips to backing by working 3 sc across the edge of each strip and through the backing, continue to corner, working 3 sc in corner. Repeat around remaining sides, working 2 sc in same st as first.
Fasten off, weave in ends.
Find more free crochet kitchen patterns here.


This looks so colourful! Thank you for making this.
This is such a fun potholder! My mom taught me how to do the loom quite some time ago, but never taught me how to take it off the loom. Hehe. This is a good alternative. Perhaps as a gift to her!
What a sweet idea that would be!